Today I finally got moving on starting the Dutch Tool Chest. My day started at Home Depot where I got all my materials and hardware. Why Home Depot? That’s simple; my purchase was mostly free all thanks to my Amex. Due to the fact that I use it for about 98% of every purchase I make I easily rack up enough points for a $100 gift card about every 3 months. Lately we’ve been using them elsewhere so this time I felt like getting some financial assistance for my chest.
I honestly don’t like buying wood from any home improvement store (mainly due to price) but when it’s free, why not. I bought 24 linear (or board) feet of 1×12 poplar. There where two 7′ pieces that were straight enough for me to take and then I had a 10′ piece cut in half. Add some casters, screws, a set of strap hinges, and a couple of handles (which I will most likely take back) and I was pushing close to $200. Throw in my military discount and $100 gift card and I walked out of there spending about $80. Even though the poplar was $5.32 a foot, I still look at it as a win. Since it’s S4S I don’t have to worry about the labor of milling and it’s straight enough where everything will end up (mostly) square.
 The seven foot pieces were perfect to give me the two sides, bottom, two shelves, the front, and lower skid with some material left over. After everything was cut to size I noticed that the boards were a little tapered in width. They were just over 11-1/4″ wide so I milled the boards to get them where I needed them to be so I could start the dovetails.
I clamped the two side pieces together and marked out the tails.
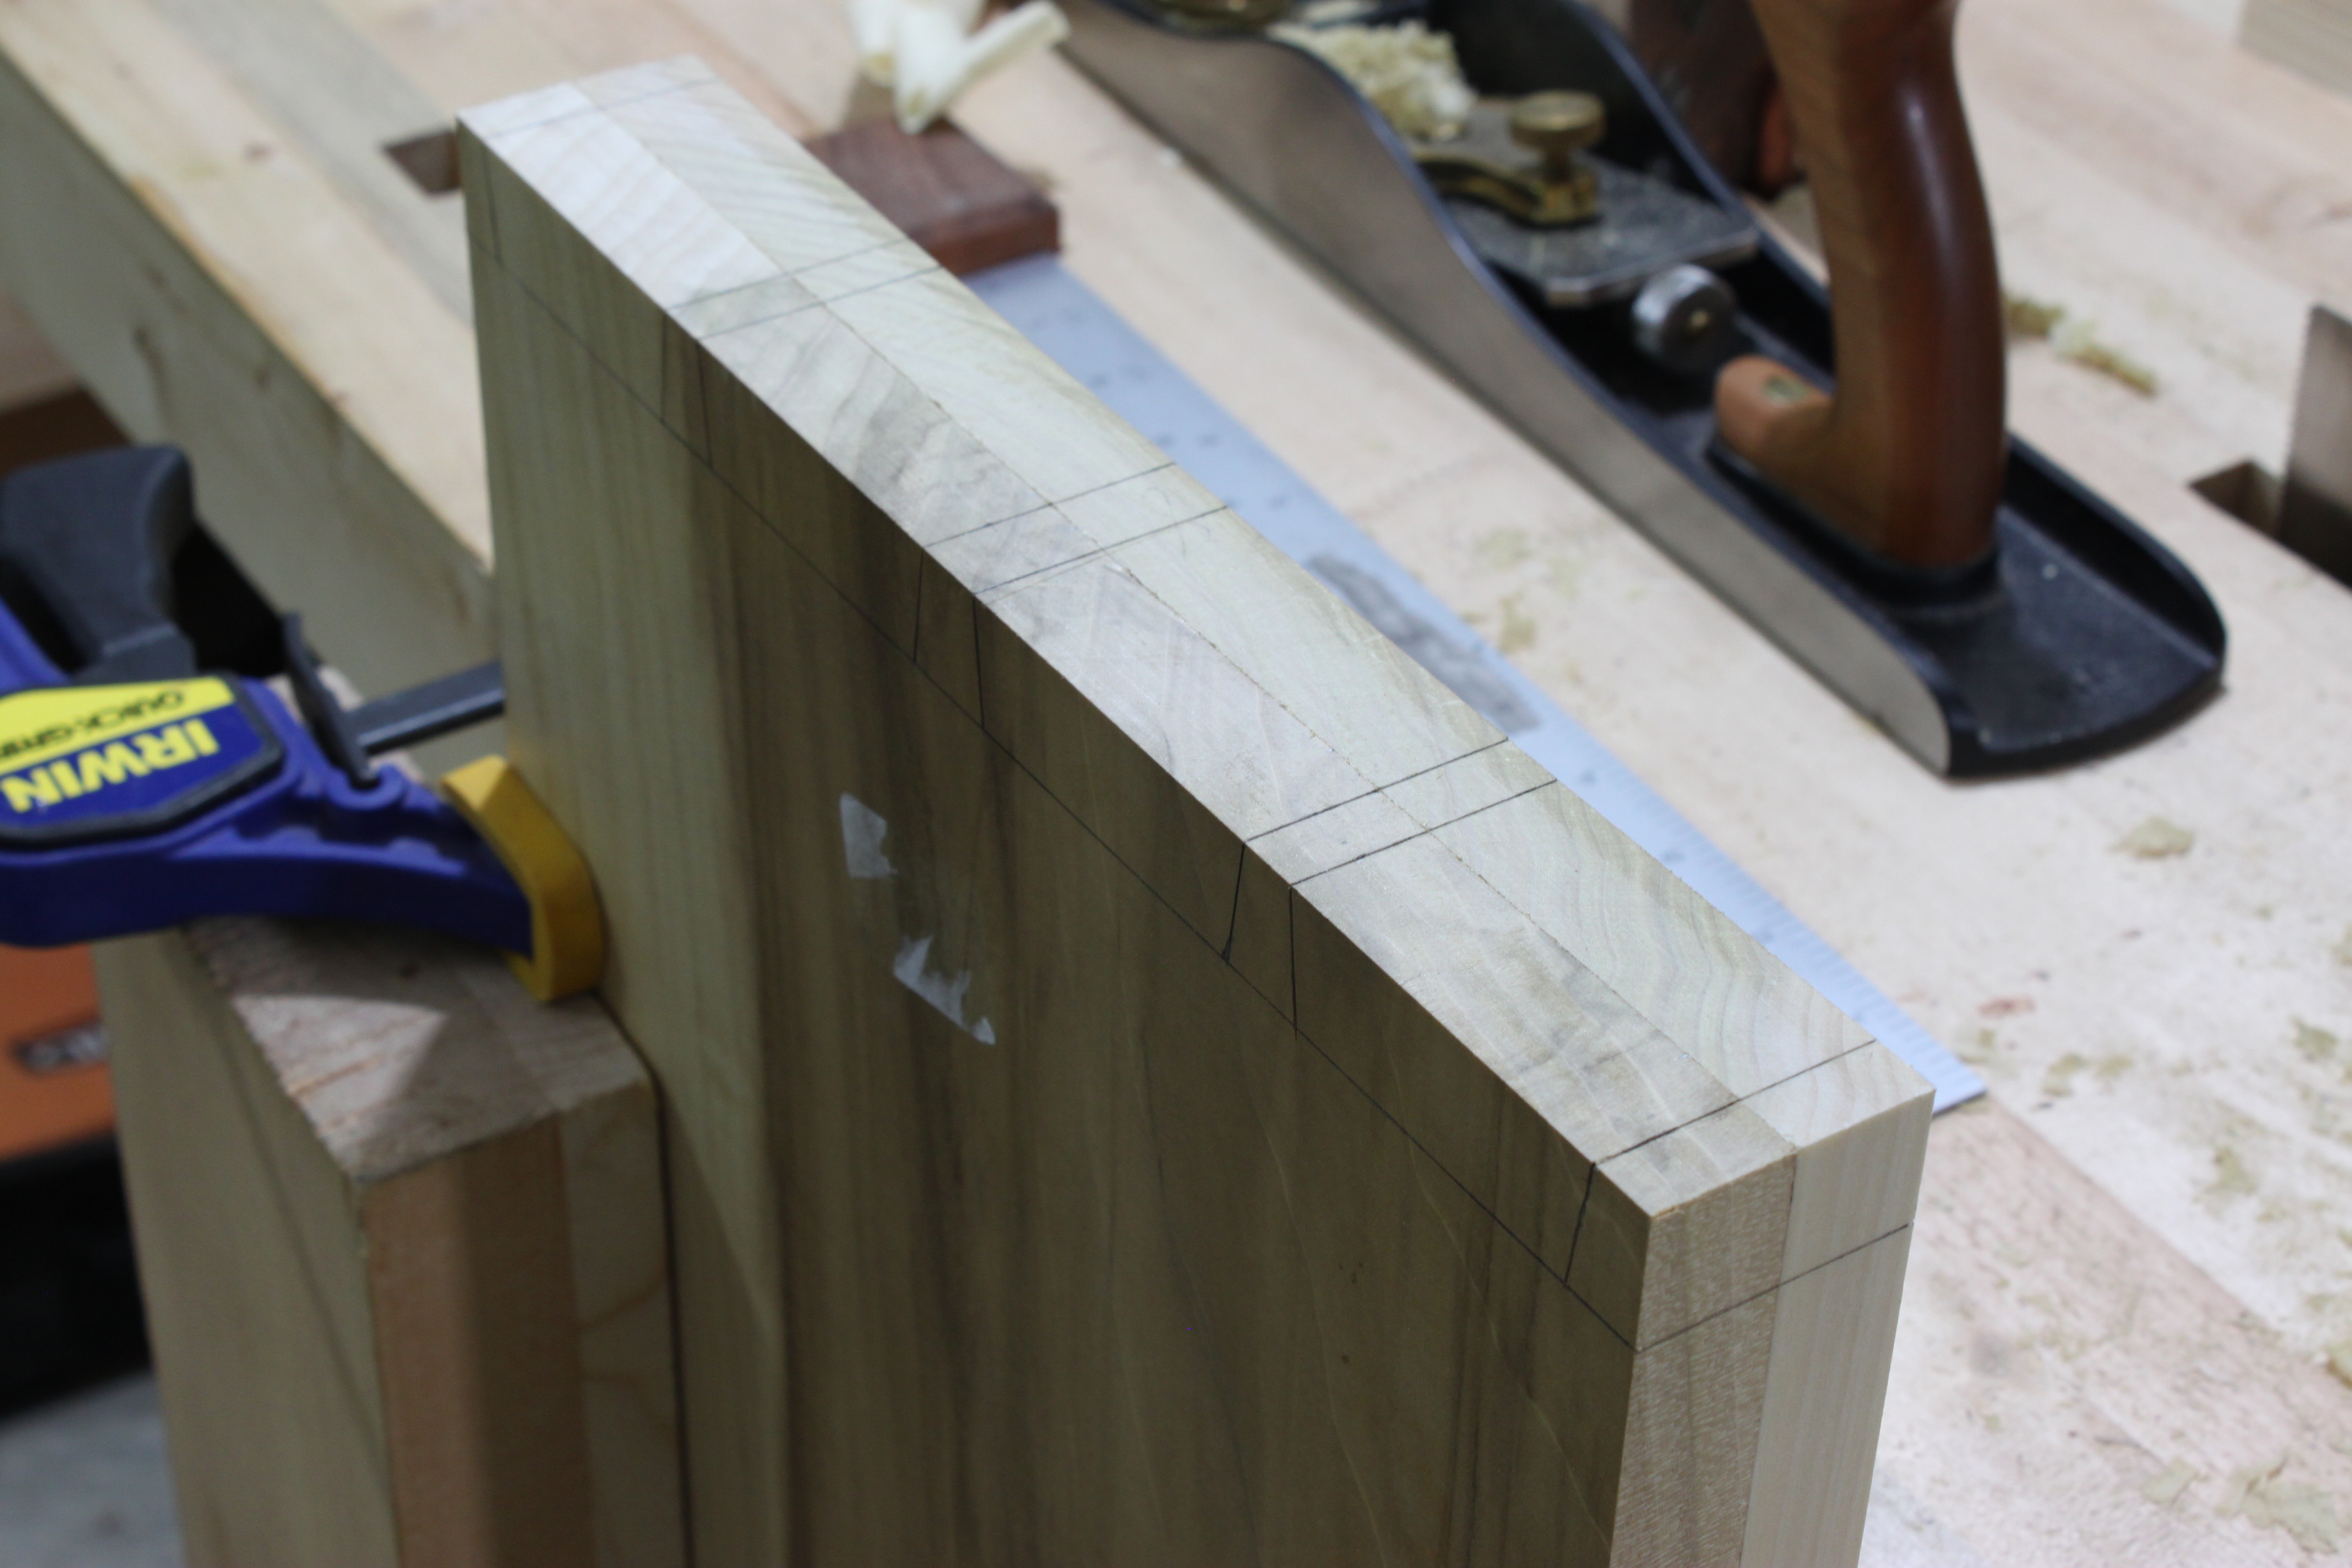 After I made all my cuts I kept everything together and cut the shoulder off the end tails
 before I separated them to chop out the remaining waste.
 I do wish I would have gone with a steeper angle for the dovetails but oh well. For marking the pins I had to pull my bench away from the wall in order to accommodate the length of the bottom of the chest.
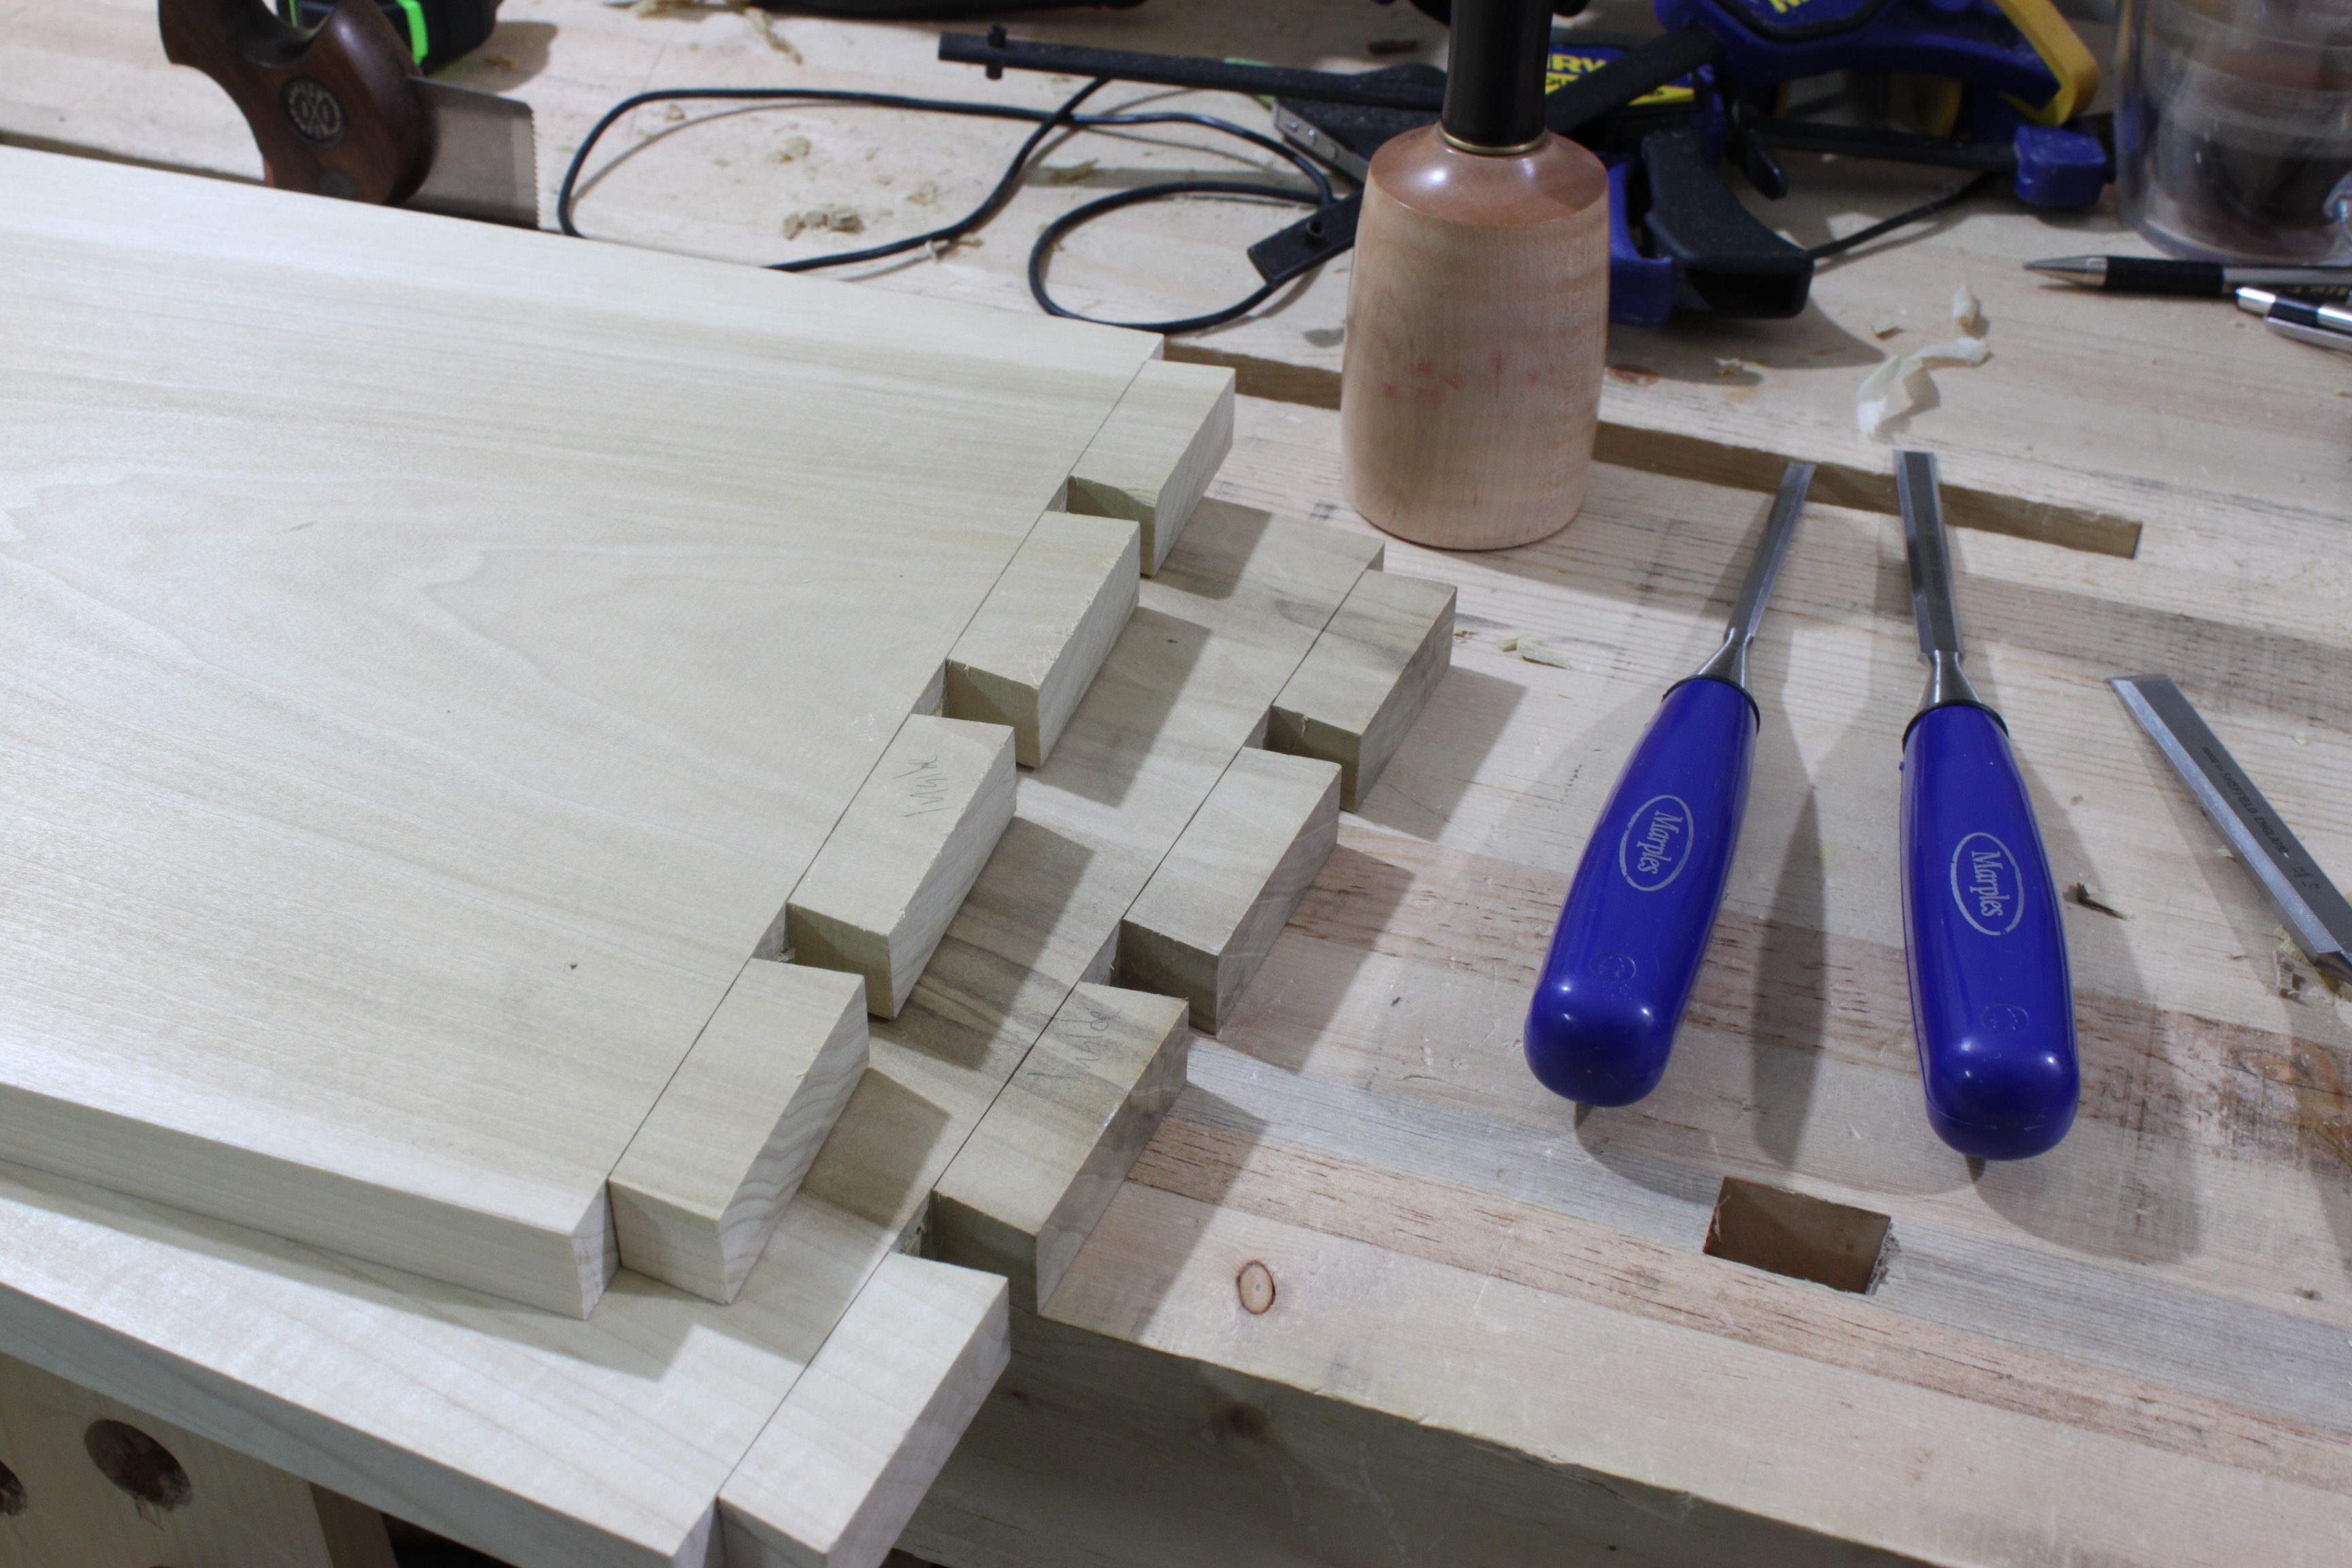
 When everything was all said and done and I attempted a dry fit. It was a little snug on the left side but a quick cleaning of the pins and another try and things were fitting well!
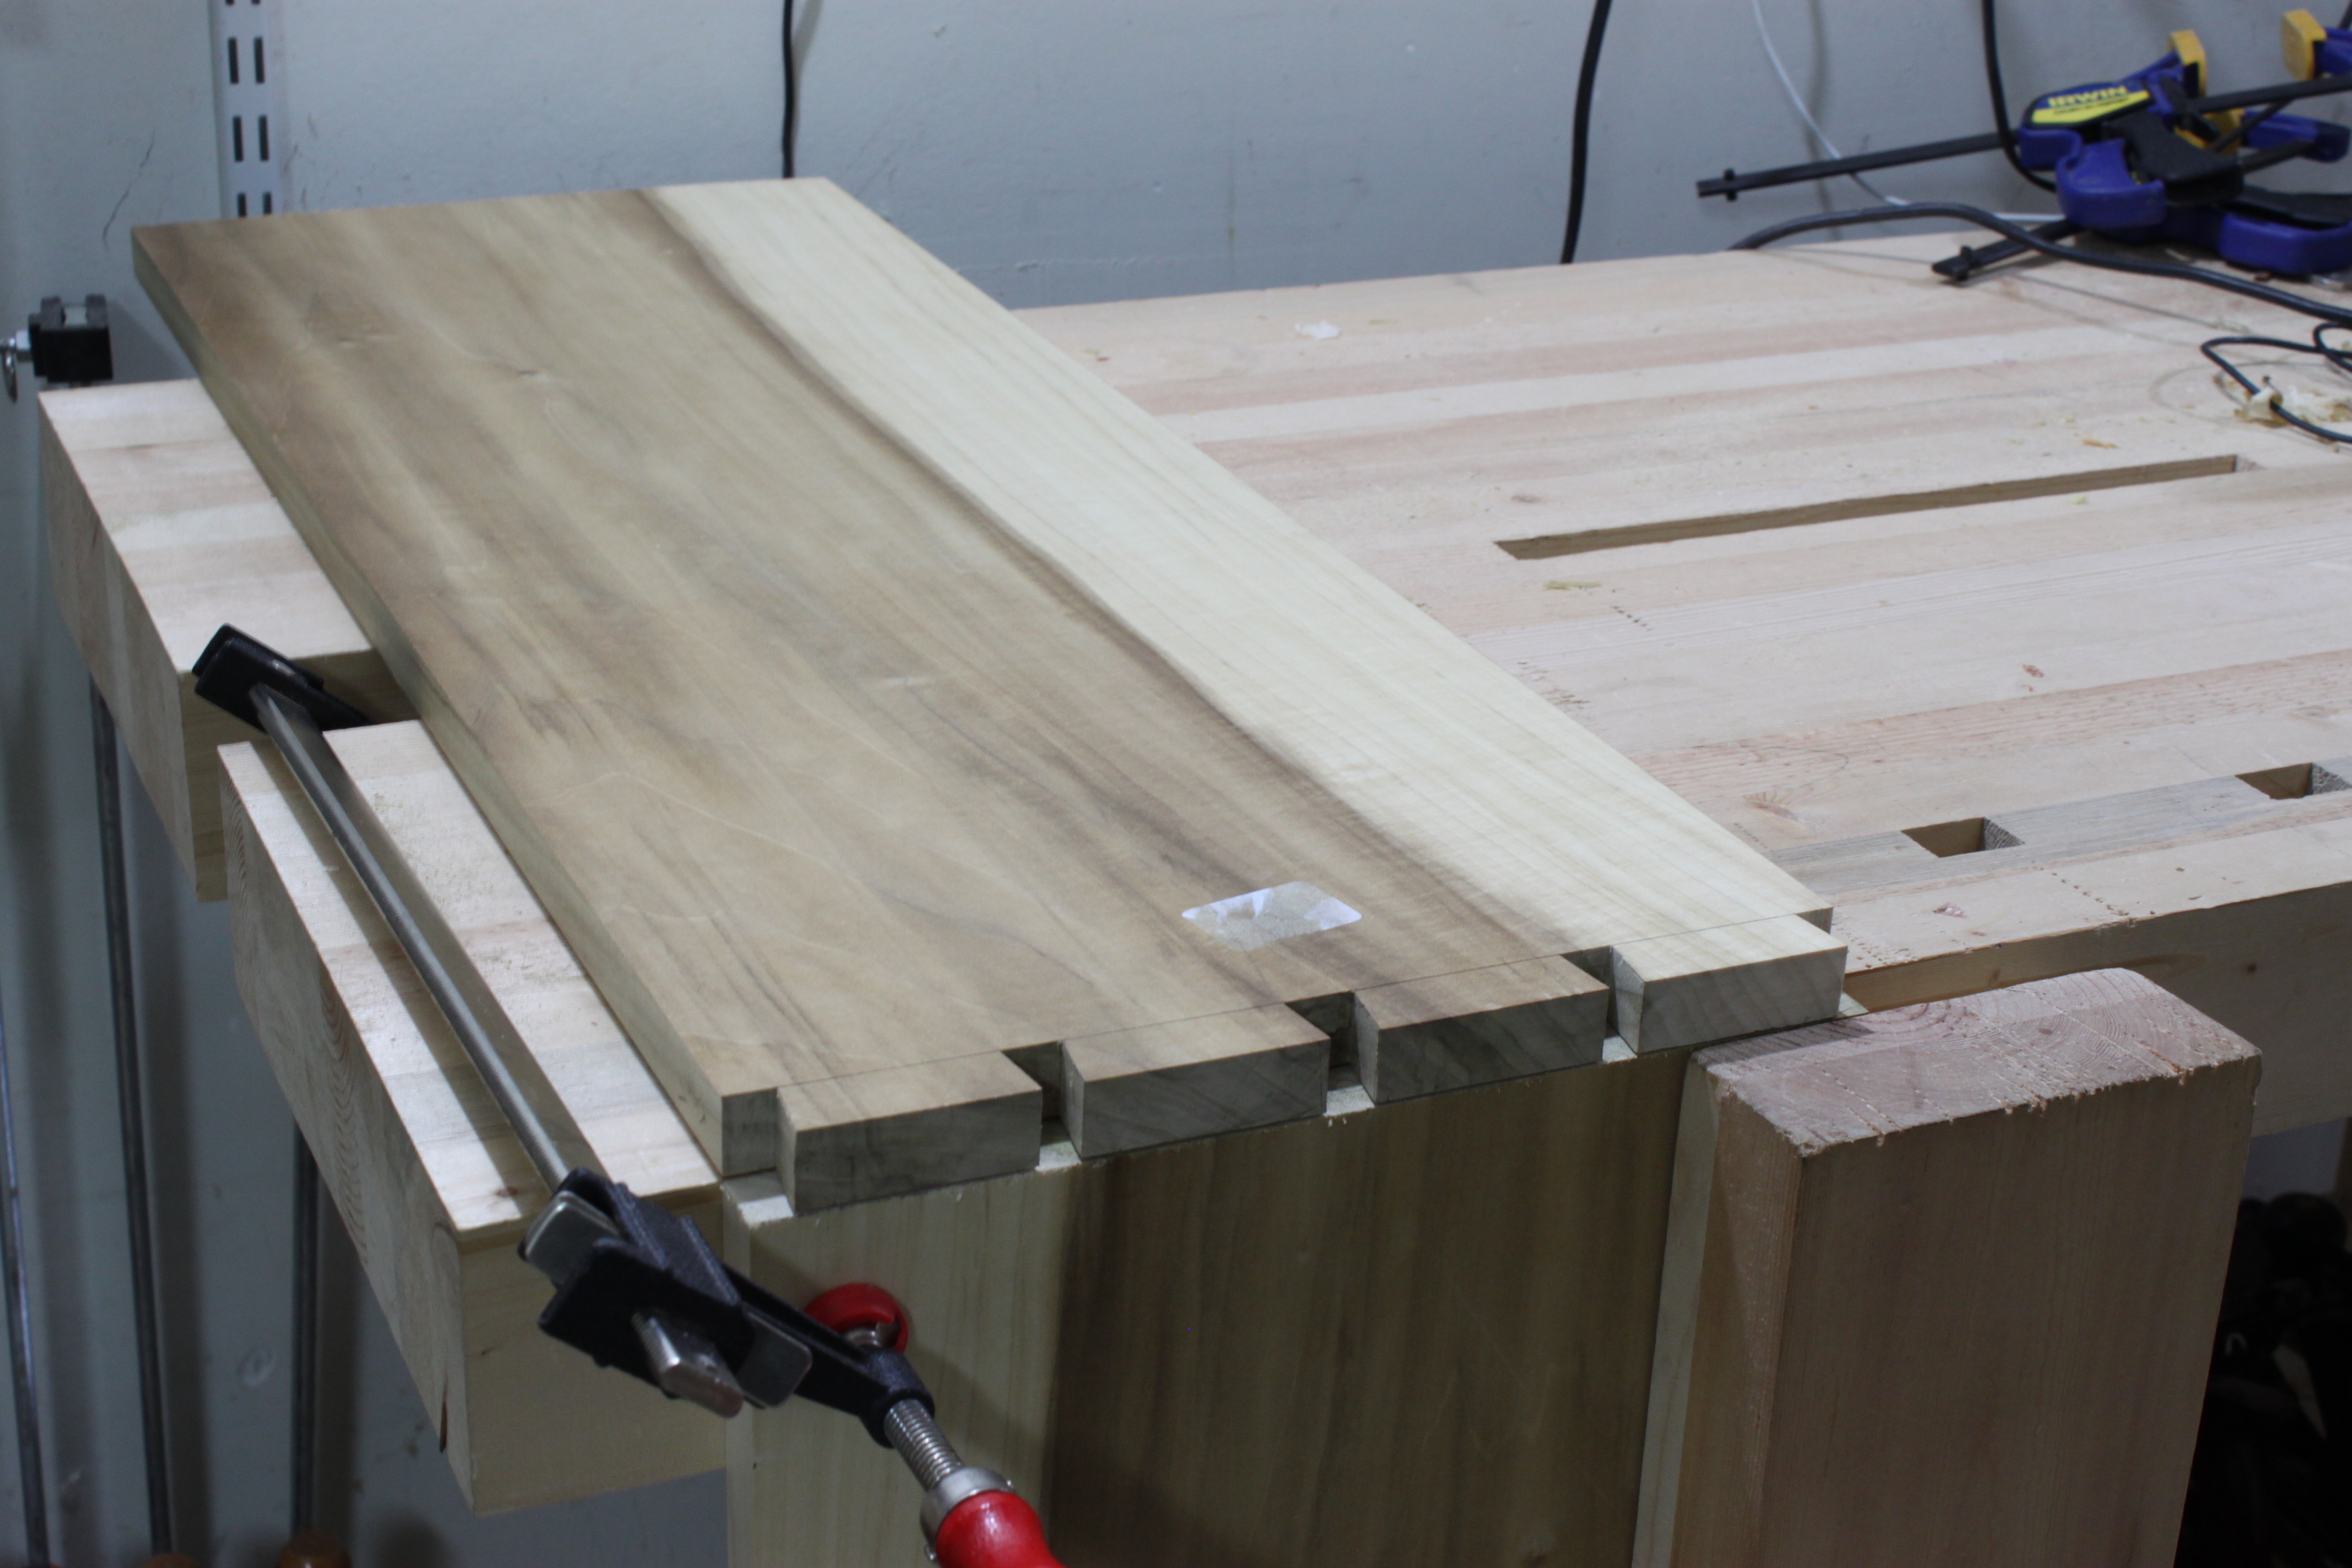
 Next and last for the day was starting on the dados for the shelves. I currently have all four marked and ready to go and even got one started before I had to call it quits for the day.
  I’m real happy with the progress made today and can’t wait to get some more done tomorrow.

I think the chest, including the hinges and handle hardware, ran me about $150 including tax. I’ve found that the Depot has decent clear pine. The oak is too hard and dried out most of the time. For my chest I went to a local lumber yard. They more or less cater to carpentry projects, but they have a decent selection of hardwood and ply, and they were competitively priced. Good luck, the dovetails look good so far.
Bill
Thanks. The select pine here is pretty good but only 6″ at the widest. There were some common 12″ boards and even though they are going to be painted were not worth it. I went with poplar mainly because they had 12″ wide pieces that were S4S. I haven’t found a lumber yard here but the base hobby shop does sell hardwoods and plywoods for a decent price. That probably would have been cheaper and it’s free to mill the boards there if you buy the wood there but I had the gift card and saved milling time by doing so. Definitely paid for convience but worth it in this case.
Thanks. The select pine here is pretty good but only 6″ at the widest. There were some common 12″ boards and even though they are going to be painted were not worth it. I went with poplar mainly because they had 12″ wide pieces that were S4S. I haven’t found a lumber yard here but the base hobby shop does sell hardwoods and plywoods for a decent price. That probably would have been cheaper and it’s free to mill the boards there if you buy the wood there but I had the gift card and saved milling time by doing so. Definitely paid for convience but worth it in this case.
My local Home Depot keeps clear pine up to 1×12 and they usually have a pretty decent selection. I went with the plywood for two reasons mainly, first was stability and the second was I wanted to make the shelves 12 1/4″ wide on the interior. The only regret I really have is not being able to assemble the case using dovetails, though using dado joinery was fairly easy and using the cut nails was fun. Once the weather evens out here a little bit I’m going to paint the chest and apply linseed oil to the interior, I’ll also add a nicer latch to the front. To be honest I’m still not sure how I’m going to lay out the tills in the top front compartment. Once I decided to not paint the chest until the humidity dropped I kind of put all of that stuff on the back burner. The nice thing about projects like these is there really are no hard and fast rules, so tills and such can get added later on or not at all.
Are you planning on painting or staining, or possibly nothing at all? I’ve thought about just coating the whole thing in linseed oil, and having a giant ‘Captain America’ star smack dab in the middle of the lid. We’ll see.
Bill
I’m gonna be painting it. I had built a bed for my daughter a couple of months ago and my wife wanted to try some milk paint so I worked in getting a coulpe of extra colors for myself in that order. It’ll be black or gray. Not sure if I want to do anything with the interior but if I do it will just be a light coat of shellac.