Over the past couple of months I haven’t been all that active in the world of woodworking and even less here on my blog. I spent so much time and effort to complete my bench towards the end of last year that when it was all said and done I think I just burnt myself out. My next goal was to get my shop organized. Project one was lumber storage and I knocked that out in a matter of a weekend though the lack of functionality of how everything was set up was still bothering me. That and I can’t ever seem to keep things clean out there. So instead of moving piles of crap from one work surface to the next, I decided that I was finally going to move my whole shop around. Here is what I was putting up with to start out with.
 The front left side of the garage is pretty much dedicated to lawn maintenance and machinery. I had my lumber storage and saw bench here and would transition to my workbench after cutting my pieces to size.

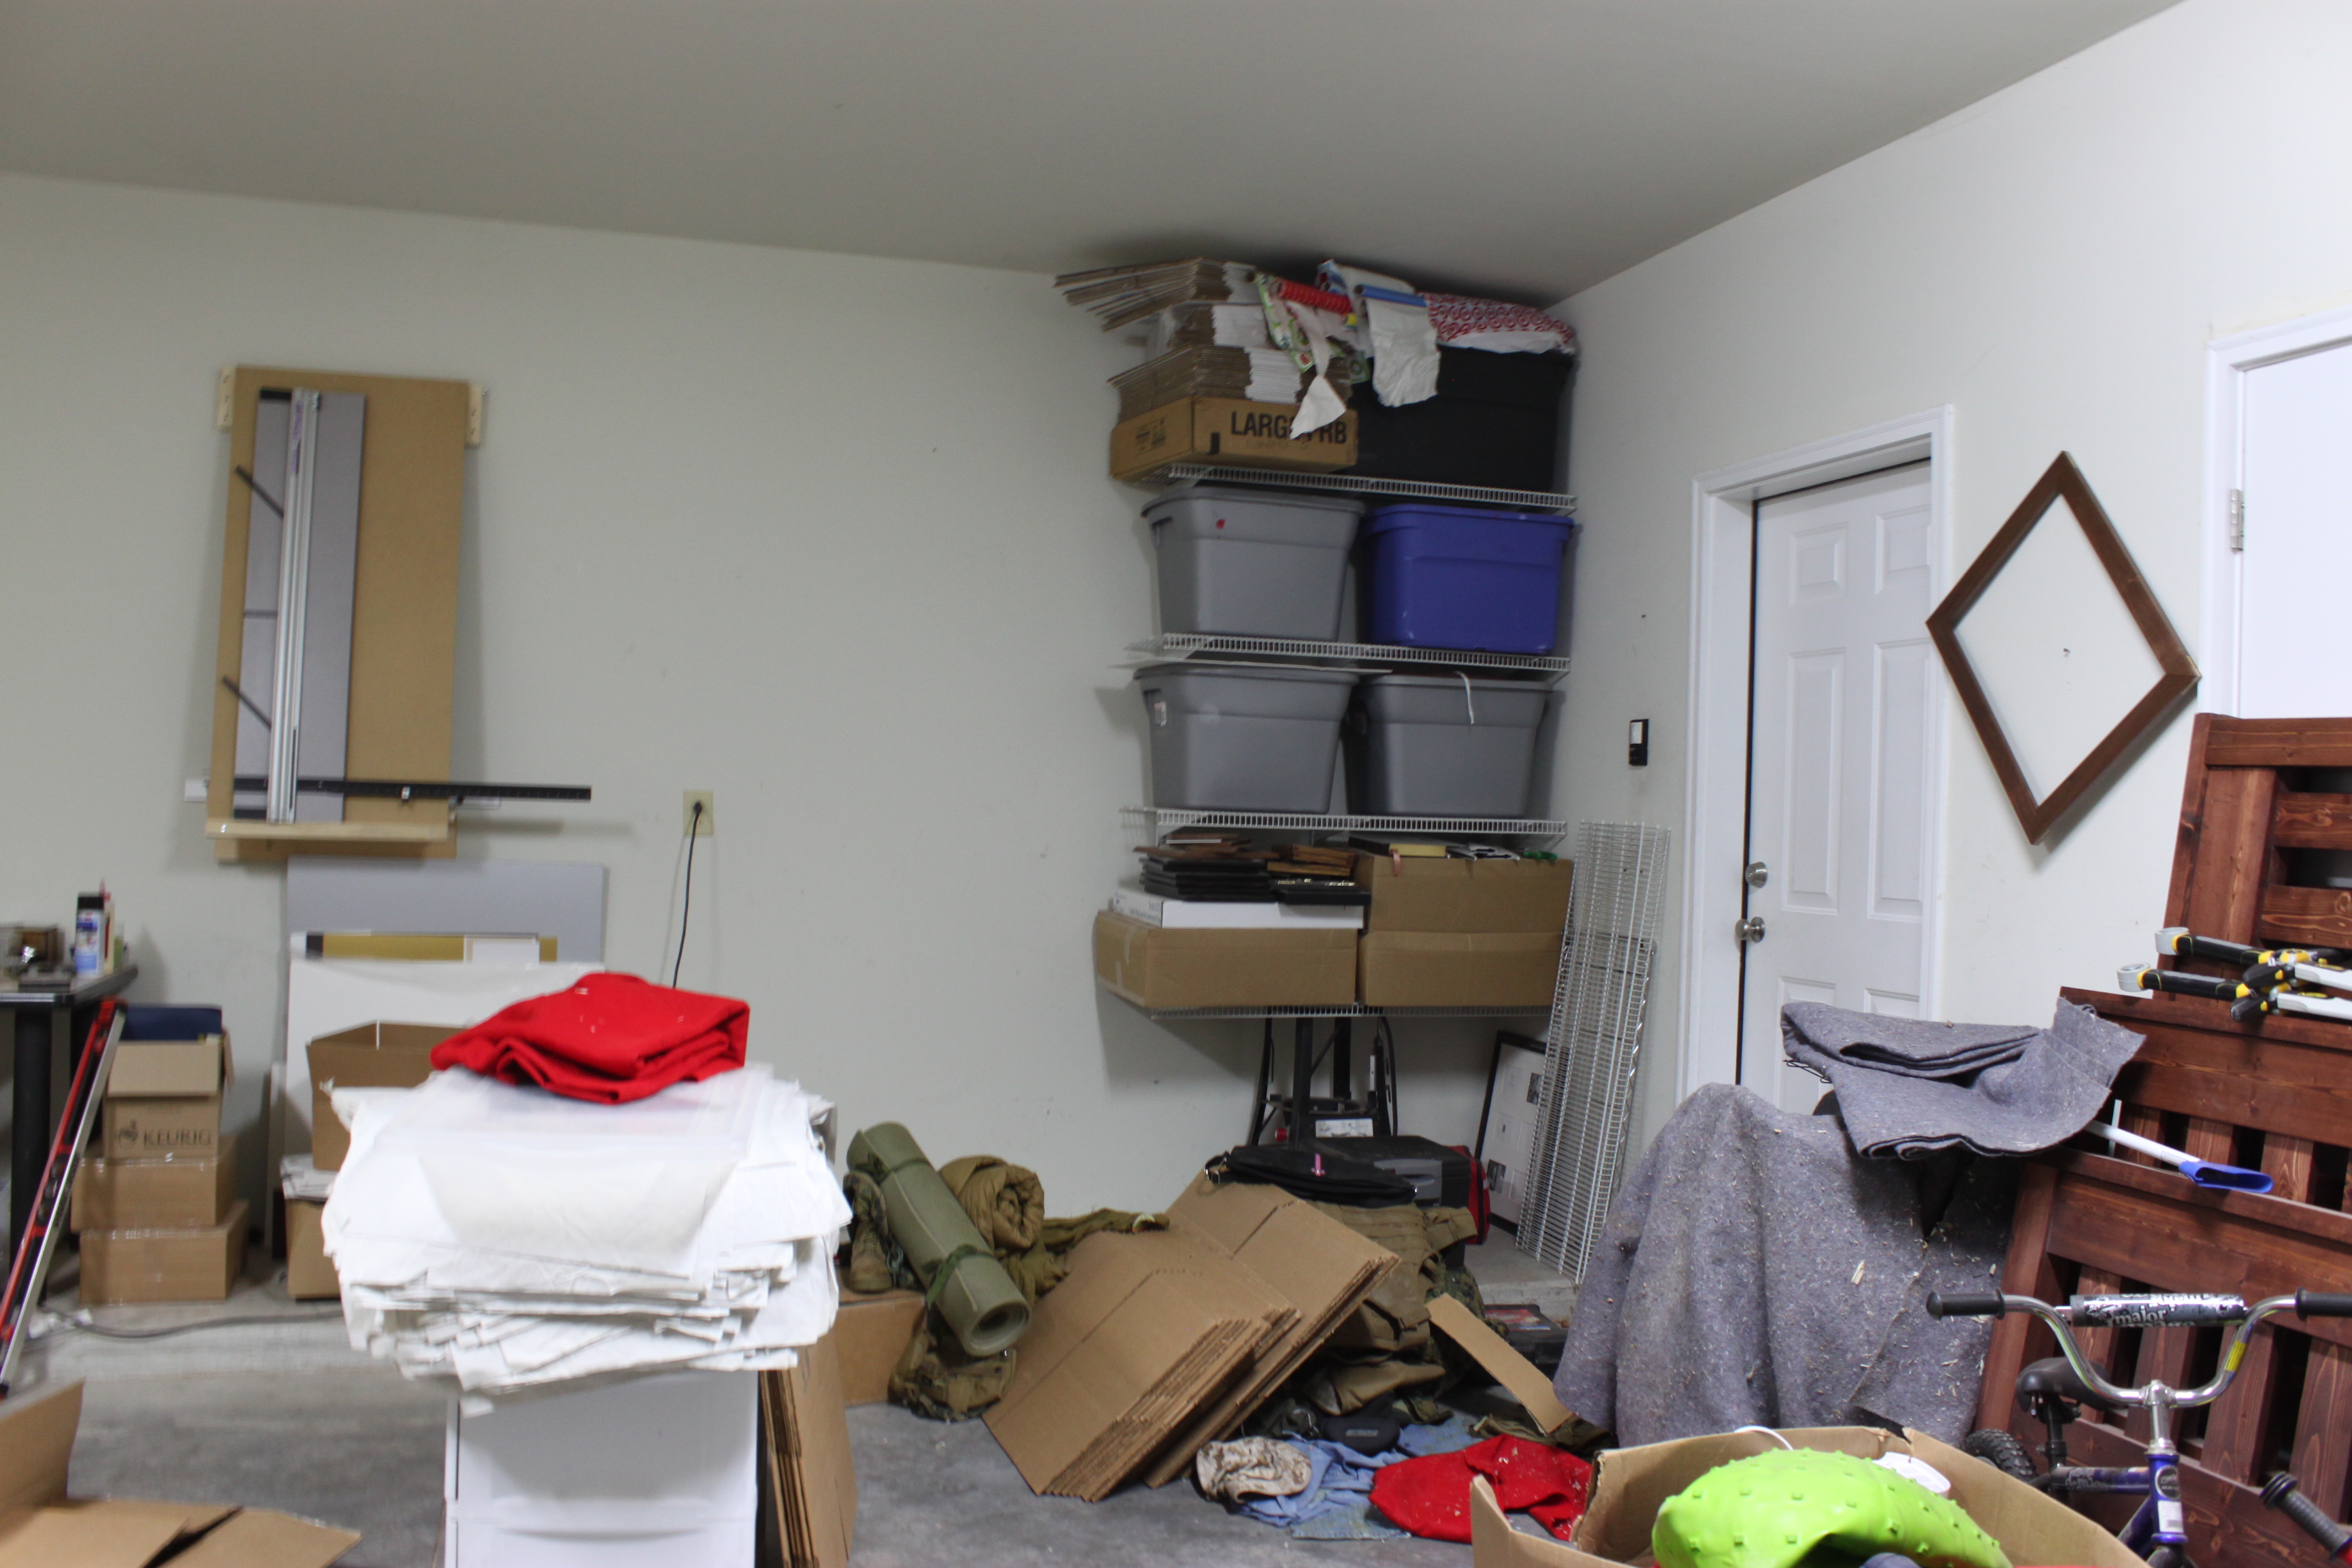
Here is where things got really messed up. I get my woodworking funding from selling frames. The table in the back is supposed to be my finishing table but as you can tell, it was just full of crap. EVERYTHING was done on my bench. That really sucked because if I had more than one project going at a time then I was just moving things from one pile to the other. That little cabinet you see behind the roll of craft paper was supposed to house my framing supplies but turned into a crappy tool storage.

My woodworking area ended at the shelving where all my CIF gear is at on the floor next to the boxes. The mat cutter on the wall was supposed to be the next stop in the frame building with the cabinet being the last stop where I would get everything assembled and ready to ship. If you couldn’t tell, everything was supposed to flow from left to right and be productive to frame making. It lasted about a day and everything just turned to a mess.
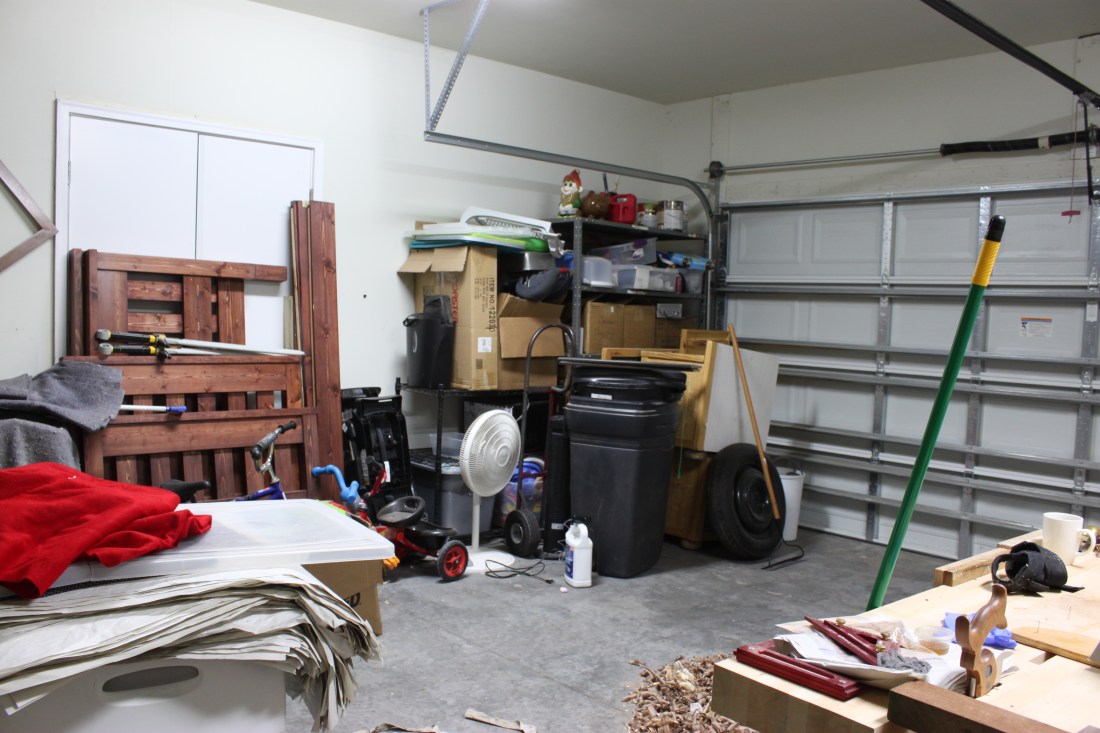 Here is the last area of the garage. Not shop area, garage. Notice those bed pieces? They’ve been hanging out in the garage for quite a few months now. I had built three beds for my kids while in Pensacola but after we moved here my wife wanted to get the kids bunk beds so they’ve just been collecting dust because I knew I could find a use for the wood. And boy did I!
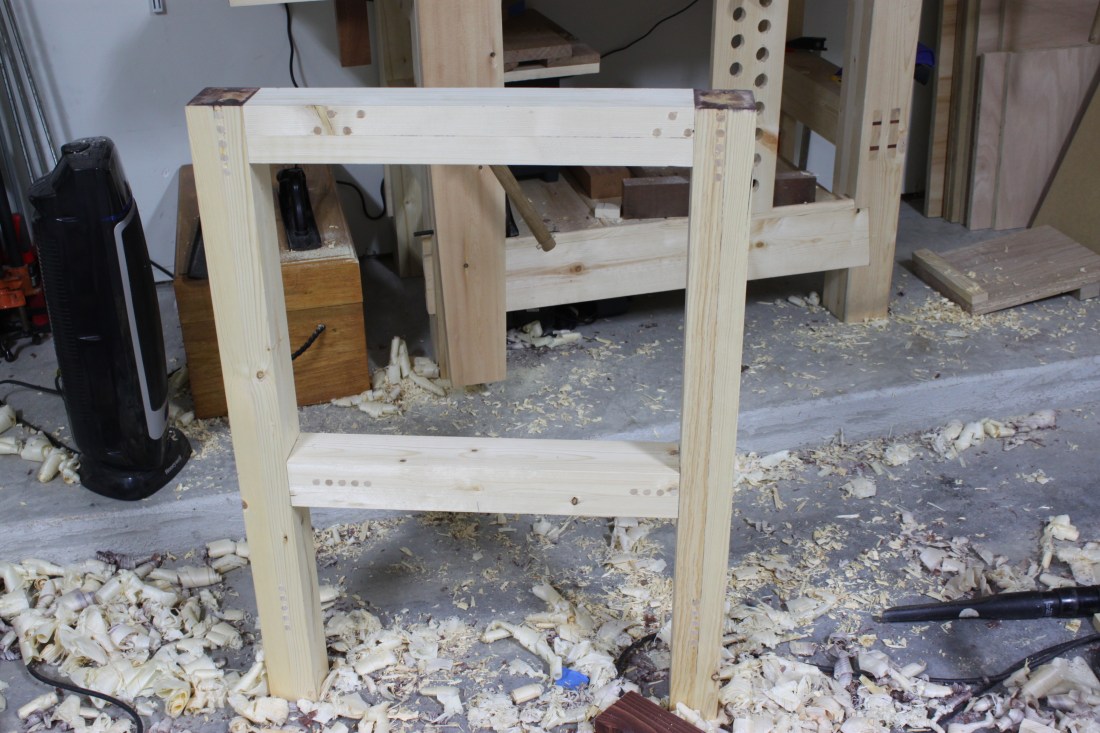
I’ve been wanting to do a few shop projects for a while but lacked the funding since I haven’t been all that productive. When I started moving things around in the garage I had thought about where to put the bed pieces when I dawned on me; break the beds down and use the wood for a piece of shop furniture! So simple I was mad I hadn’t thought of it sooner. Luckily they were built with a dowelmax and getting them apart wasn’t that difficult. These were one of the last things built while I still had all my power tools so everything was pretty square and straight. That was especially important because I wasn’t digging the stained pine so I ran my #7 over these boards until most of the stain was off. I didn’t measure or check square because it was just shop furniture and that’s just how I roll.  The entire basis of this table is based off of available materials. The height, width and length are all determined by what I had on hand only. Here you can see that my design aspects slightly relate to my bench.
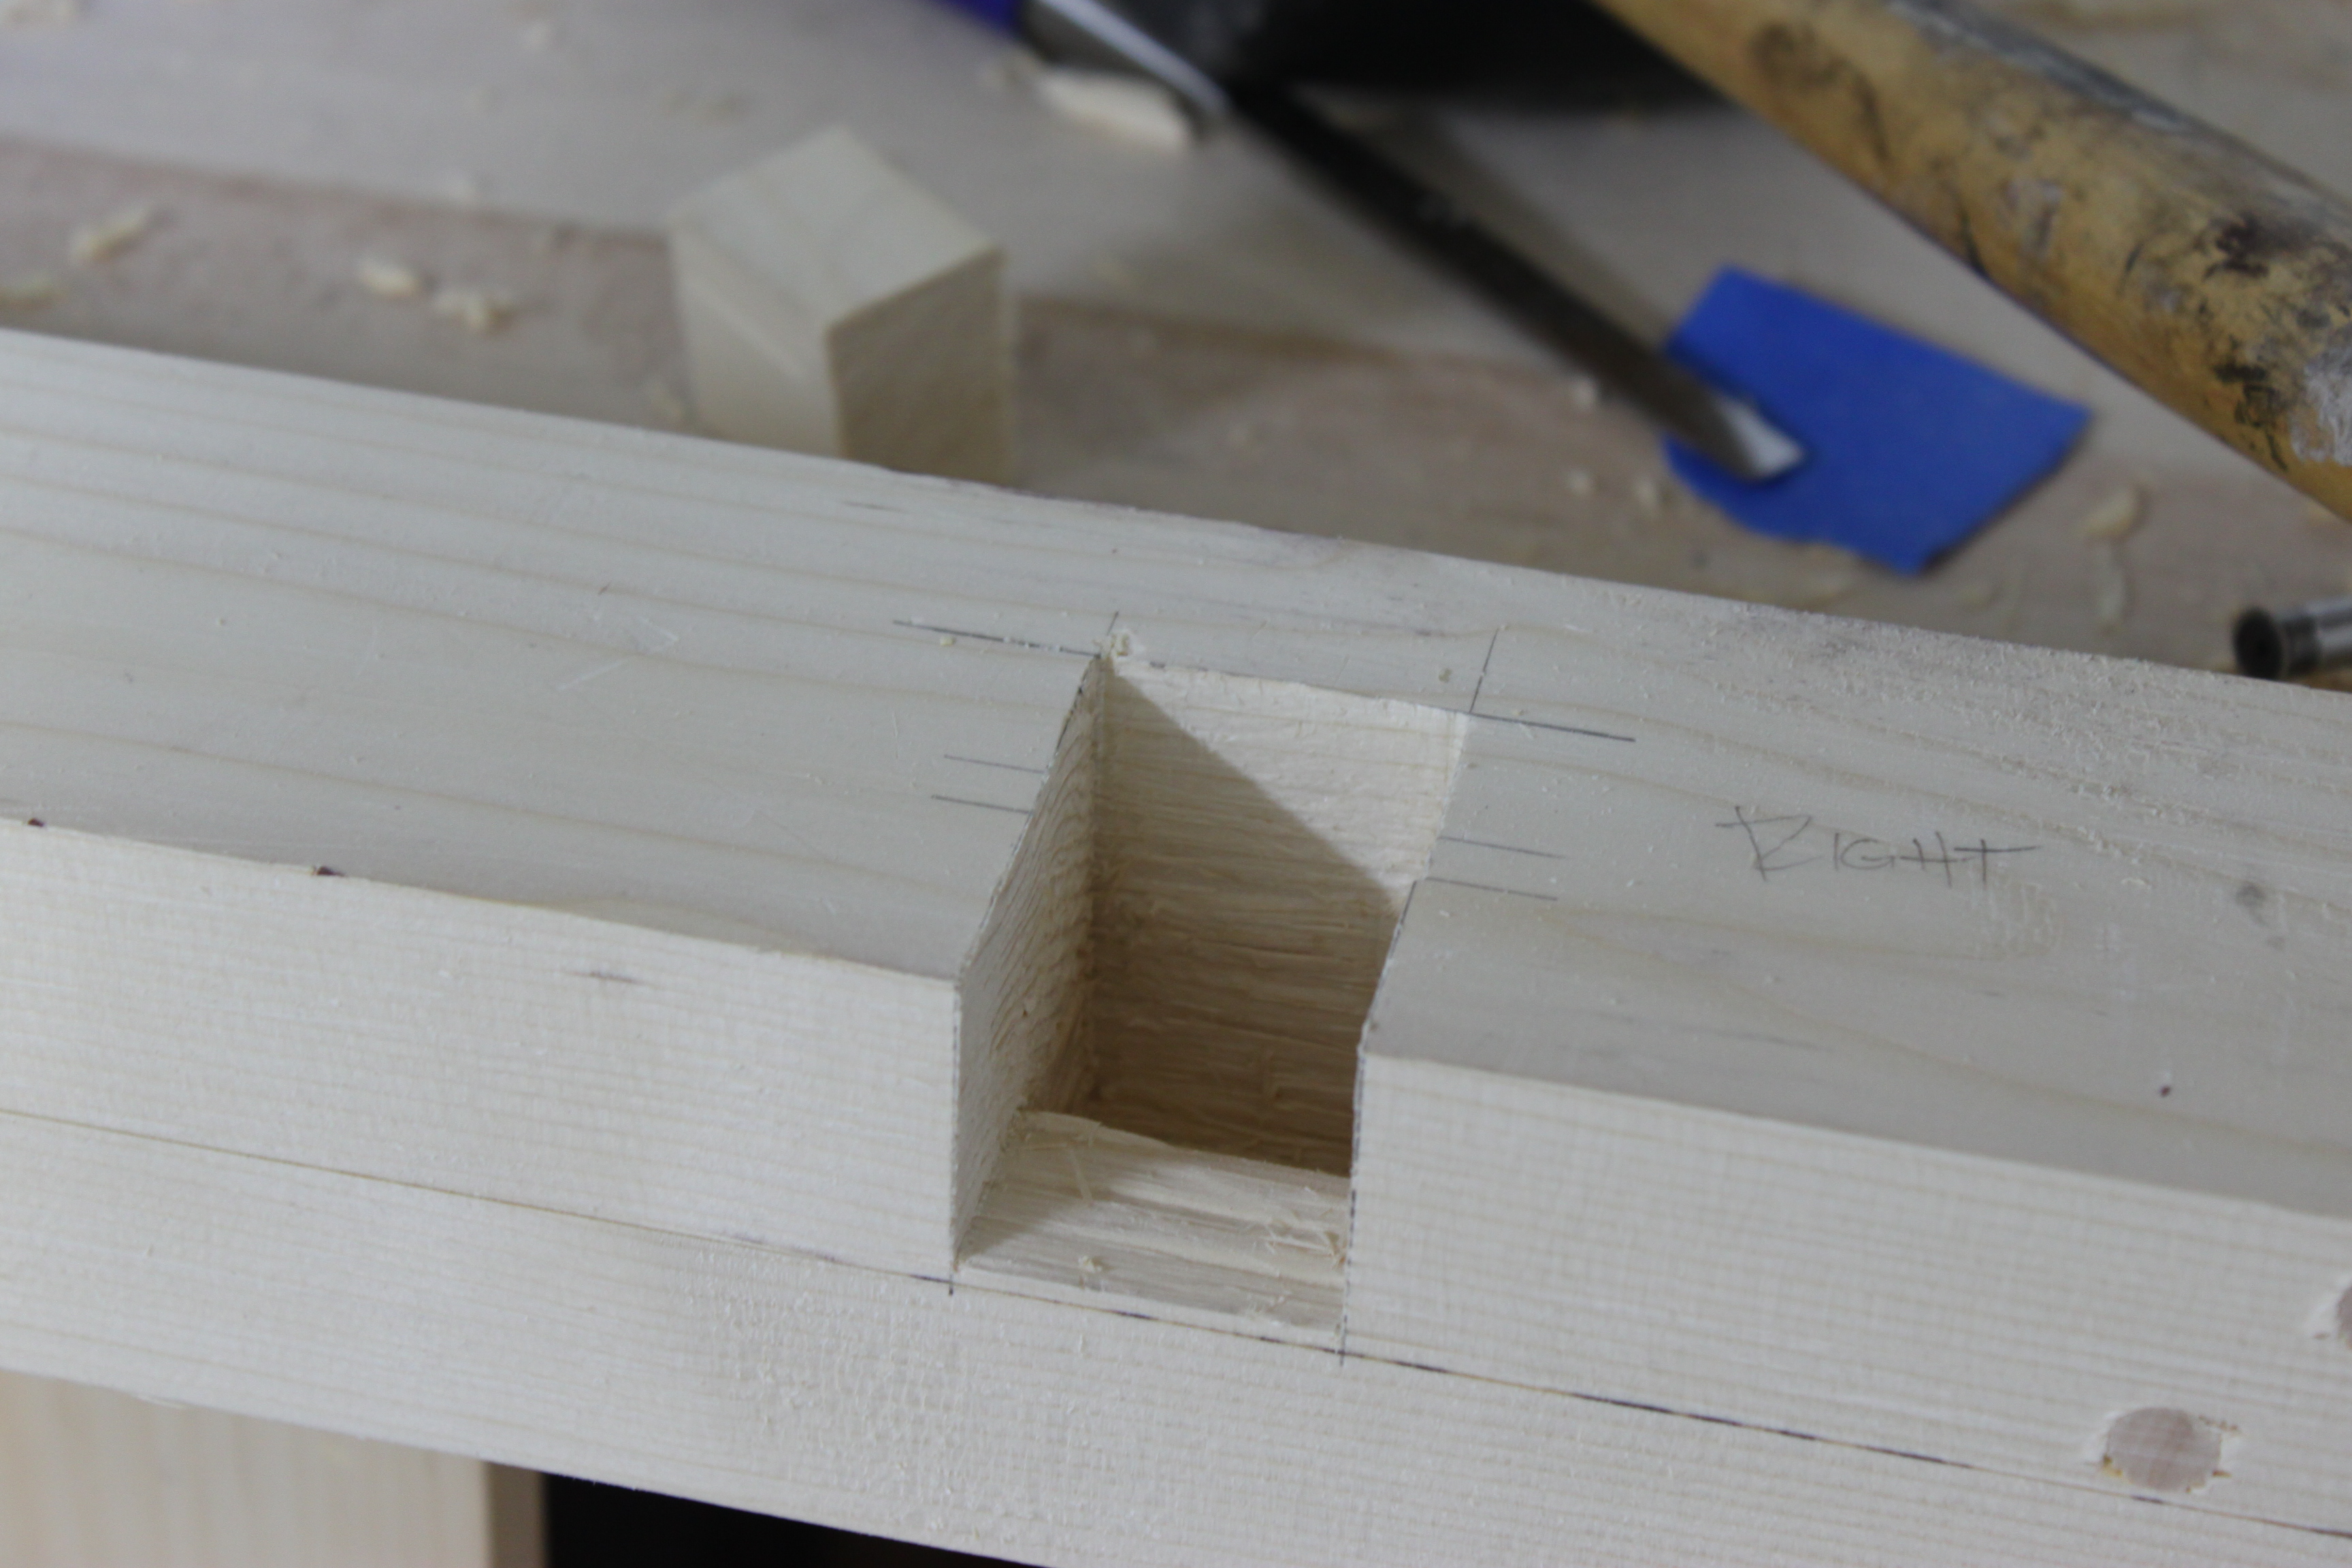
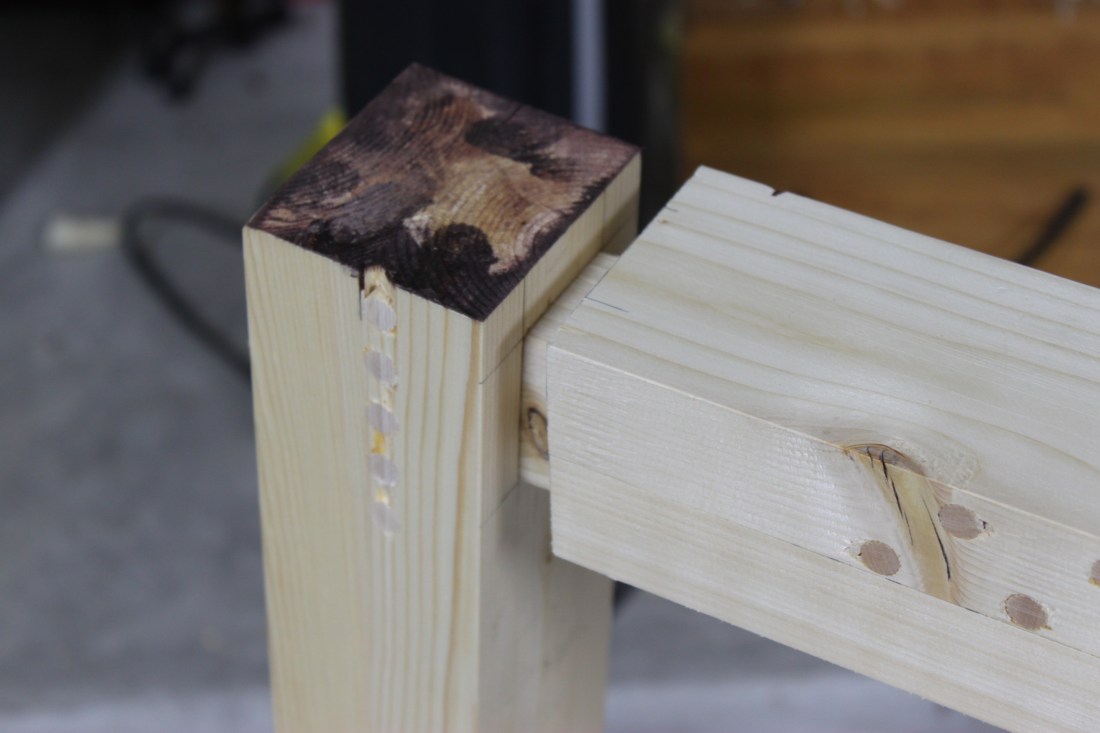
 The beds may have been built with a dowelmax but the joinery here is all mortise and tenon.
 I really didn’t take many other pictures of the building progress but here she is mostly done and already full of crap.
  The top is two sheets of MDF screwed together that I’ve been trying to use for what seems like forever. I also screwed a skirt around the top as a temp look. I’m gonna glue some planed boards to the top but as it was mostly done and I really needed to use it I just threw those on to cover the edges of the MDF. Although I didn’t go for the haunched dovetailed tenon, I did feel it needed a little jazzing up.
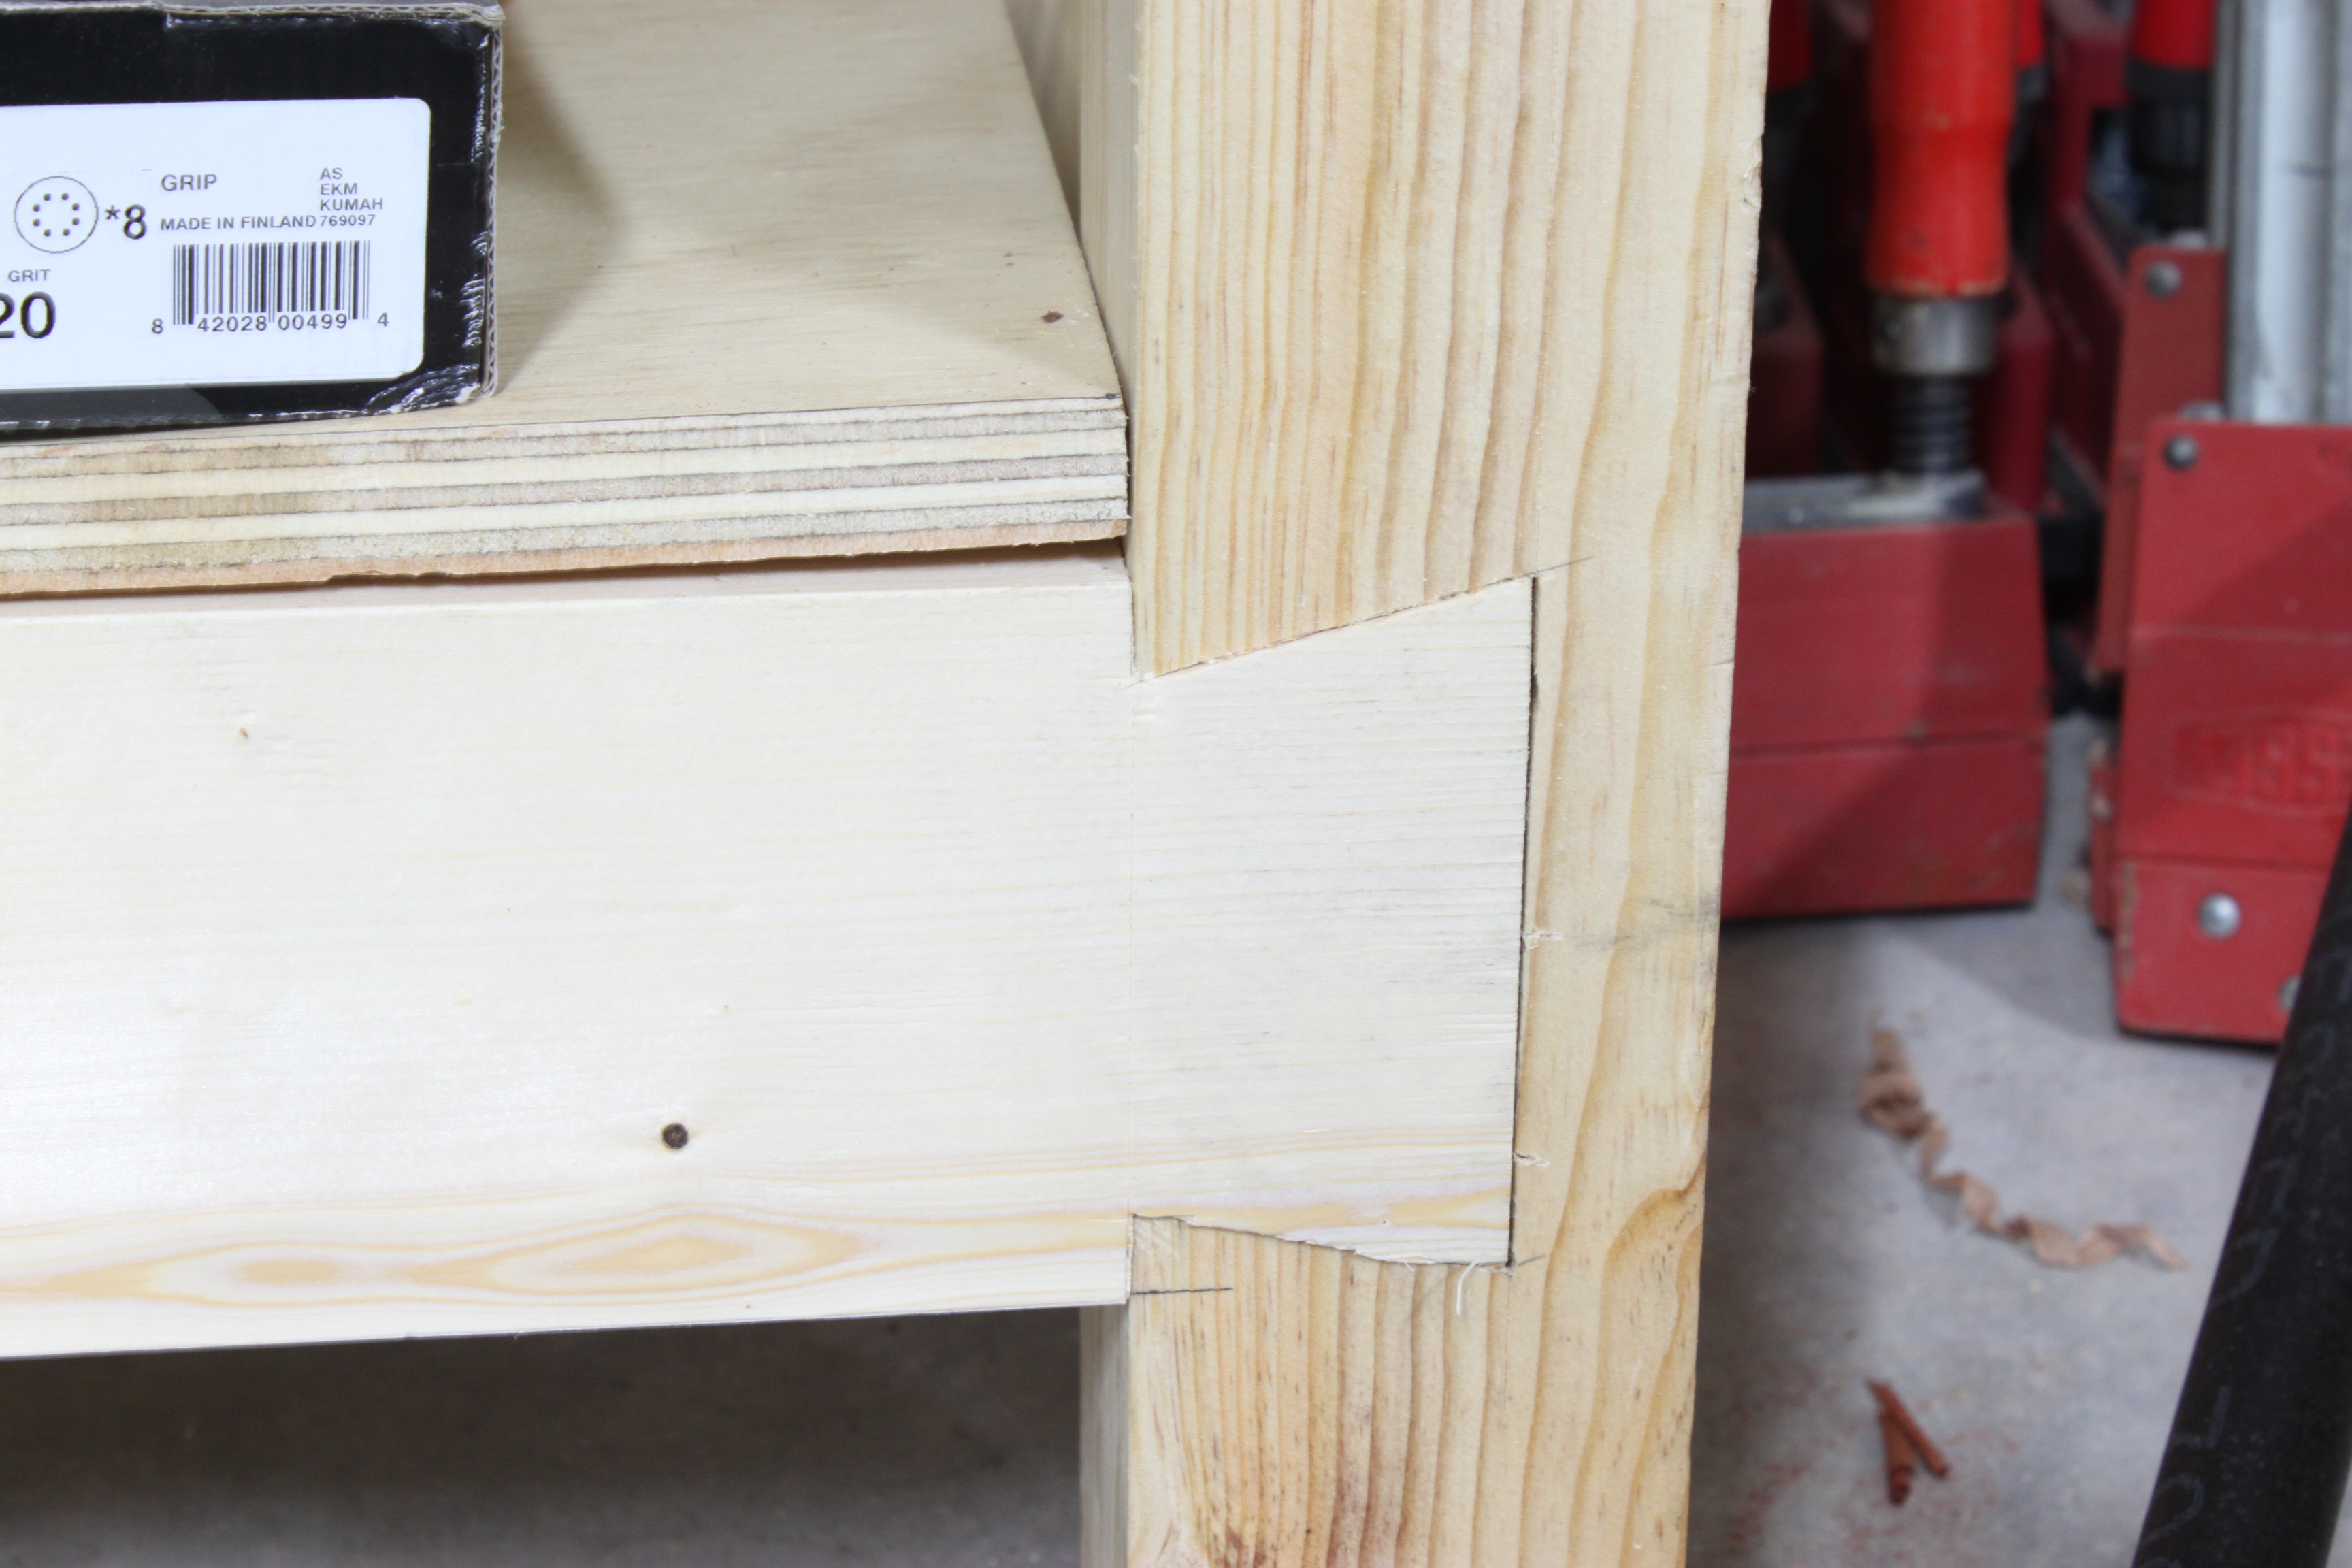
 Nothing pretty but again, shop furniture. I’m not a furniture designer but I did go with the dovetailed tenon for a reason. With my bench, the base is nice and stable because the tenons on top of the legs sit in the mortises of the benchtop. With these legs, there was no tenon so I added two rails under the top that hook into the legs to give support to the top as well as help square things up.
 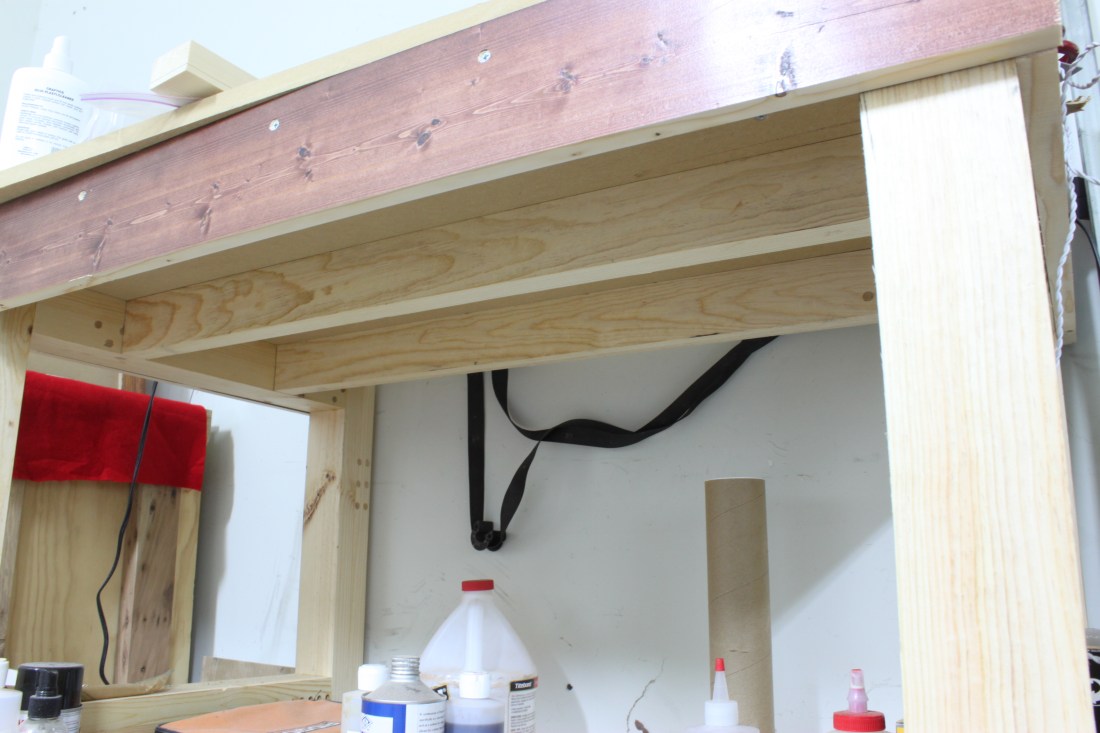 These aren’t exactly mortised but rather hook into the base. I didn’t get a picture of the rail hook but here is it’s mating piece.
  The main reason for both these types of joinery was to still use what I had on hand only, or lack there of. In this case clamps. If I had done basic mortise and tenon, I would have had to glued and clamped them down all at once. I don’t have enough clamps that long. So with the hooked rails to the top, I could establish the distance of the the length of the top and since the bottom stretchers are dovetailed, I could just hammer them in from the side without worrying that they would spread apart. Make sense? Well in the world of Dan it definitely does. It’s not complete because I am going to add a cabinet on the bottom where all my finishing supplies are hanging out right now. That’s gonna help me use up some plywood that I’ve been trying to get rid of as well. That will most likely be a trip to the hobby shop though so I can knock it out in an afternoon. I hope to have this all finished up by the end of the month so stay tuned for that. I’ll also have an update on the reorganization of the entire shop soon.

 Like I had mentioned in my last post I never glued any of the joints so I thought that’s where I would start so I won’t be able to take it apart again. I had also mentioned using a hook type of mortise and tenon (not sure if it’s an actual type of joint) and didn’t get any pictures but since it was all apart I got a snap in.
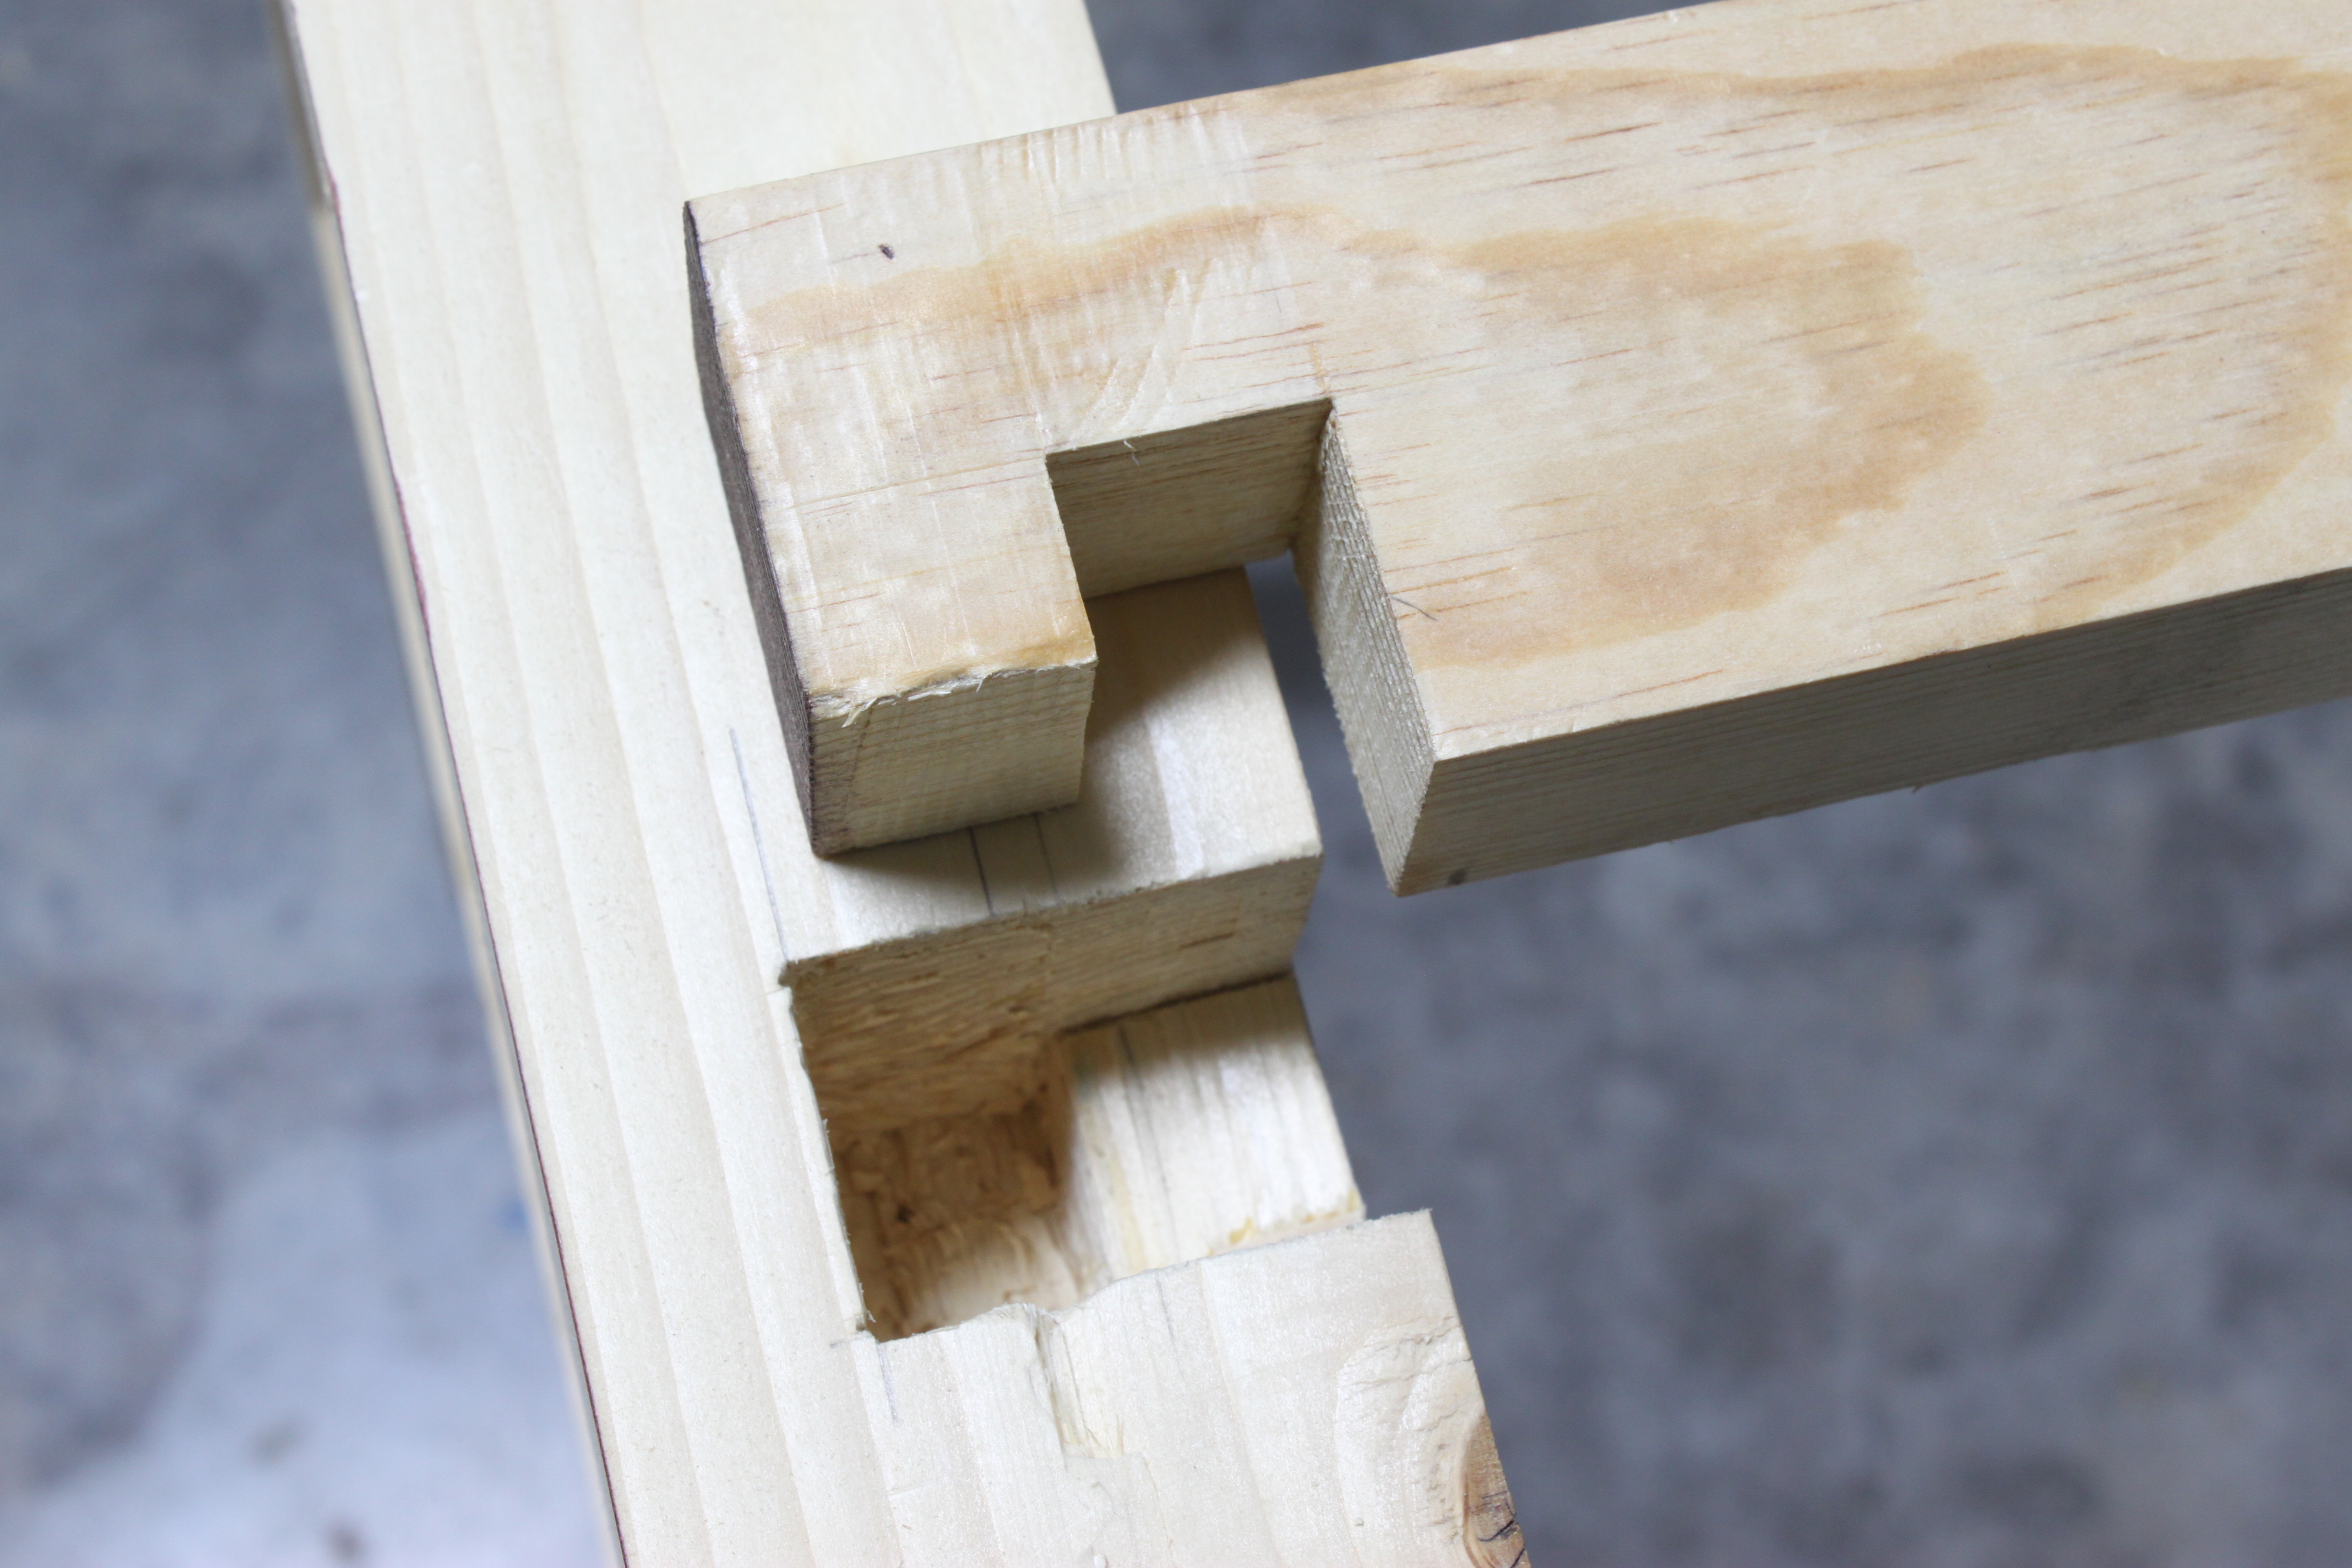 With everything glued up I decided I wanted to start on the cabinet portion. What seems like what should have been an easy solution actually took me about two days of brain storming. Again using only what I have on hand my idea just happened to work perfectly. It’s just two pieces of plywood that were already the perfect size to be notched to fit in the top rails.
 I don’t know exactly how tall they were since everything was just relative dimensioning. All I know is that they were tall enough to fit securely and short enough at add spacers on the top without interfering with the table top.
 With the carcase done it was time to work on the the drawers. Again, being horrible at actually documenting as I work, I knocked out the first one without a single image of the progress. It all went together smoothly other than the fact that it’s a little narrow in the back. I measured about 1/8″ short but you can’t tell by just looking at it.
 As you can see I still haven’t added a bottom but here’s one down, not sure home many more to go. It’s a little deep at 5-3/8″ but that’s what I had on hand and didn’t feel like ripping it down. I can just add a sliding tray later on if need be. Maybe one more this size and the rest with the 1×4 boards. Well the kids are down so I guess it’s time to head back out to the shop and start the next drawer.