The Final Details

I can finally call this project complete!

painted dutch chestIt took just as long to add all the details as it did to build the entire chest. I did give it my own personal touch that I haven’t seen elsewhere yet.

open dutch chest
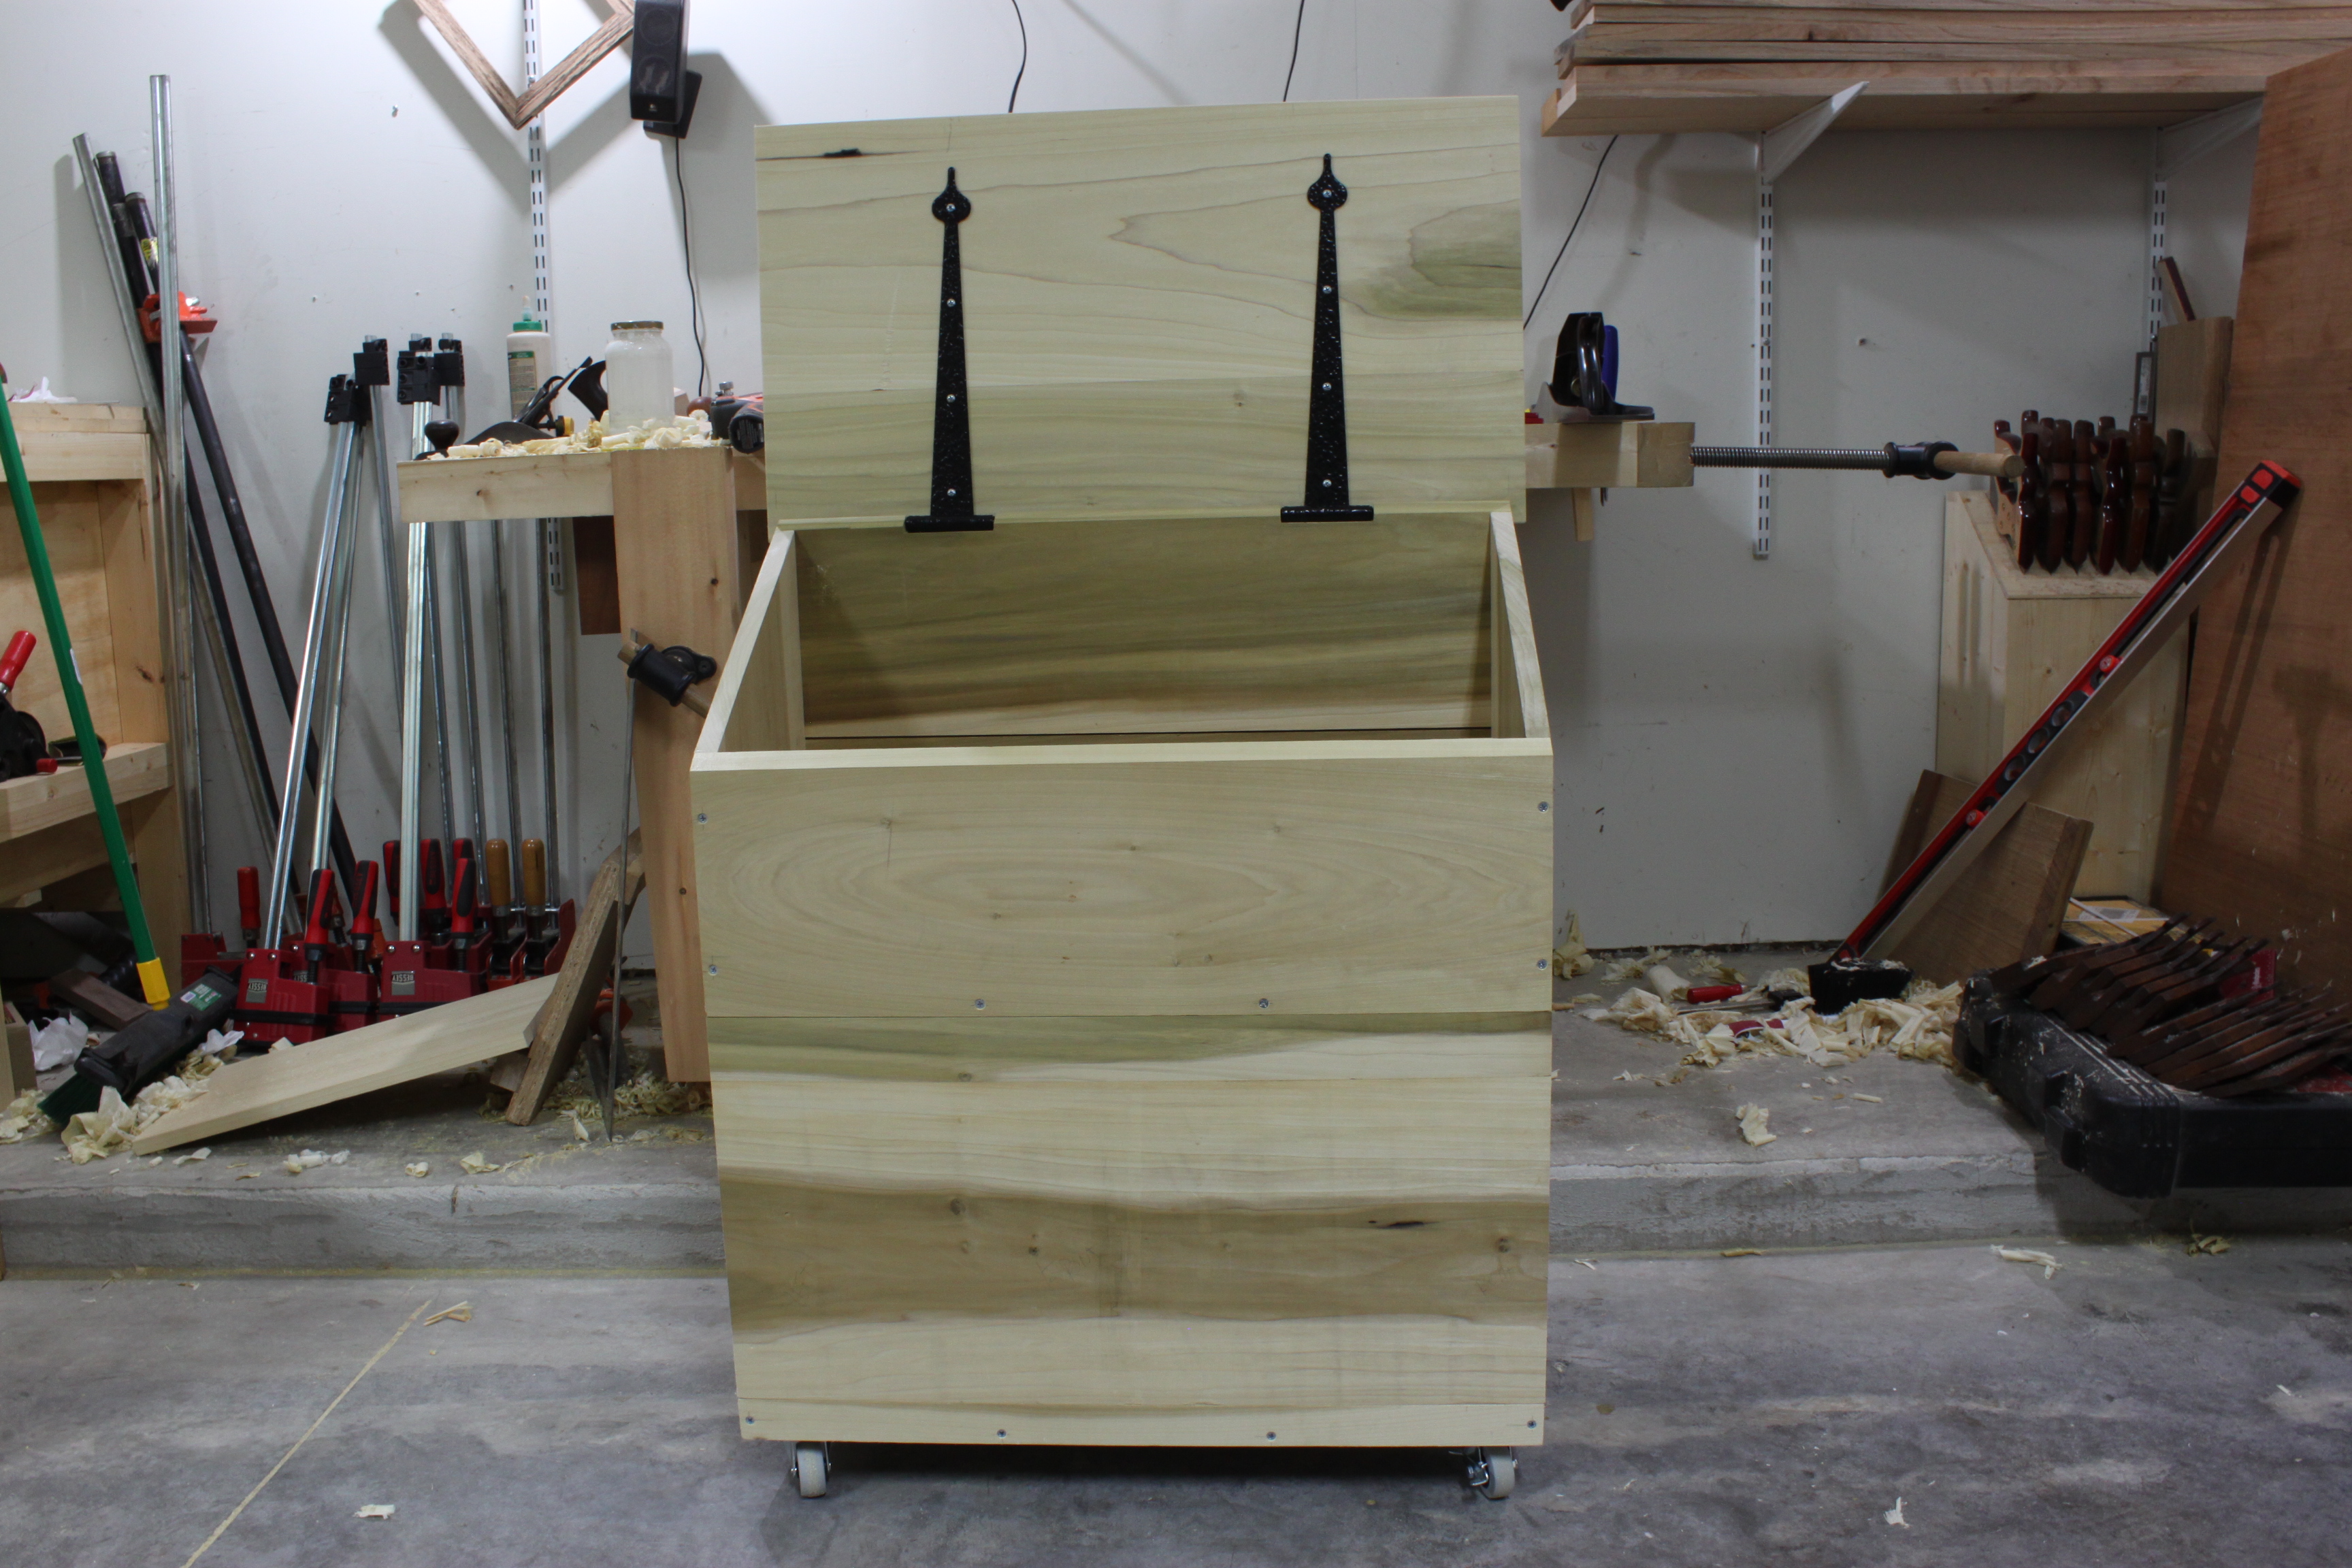
The front-fall kept getting in my way if I didn’t have it sitting on my bench. I had it leaning against the chest but kept knocking it over so I wanted to come up with a way to store it. Initially I thought of just attaching it to the back but as I was brainstorming I came up with an even better idea. Use that prime real estate for more tool holding.

dutch chest front fall lidOther than the square I consider these my lesser used tools. I didn’t want them in the bottom of a drawer somewhere so what better place to store them. I used some 550 cord threaded through the catches and hanging on a screw in the lid.

dutch chest lid detail
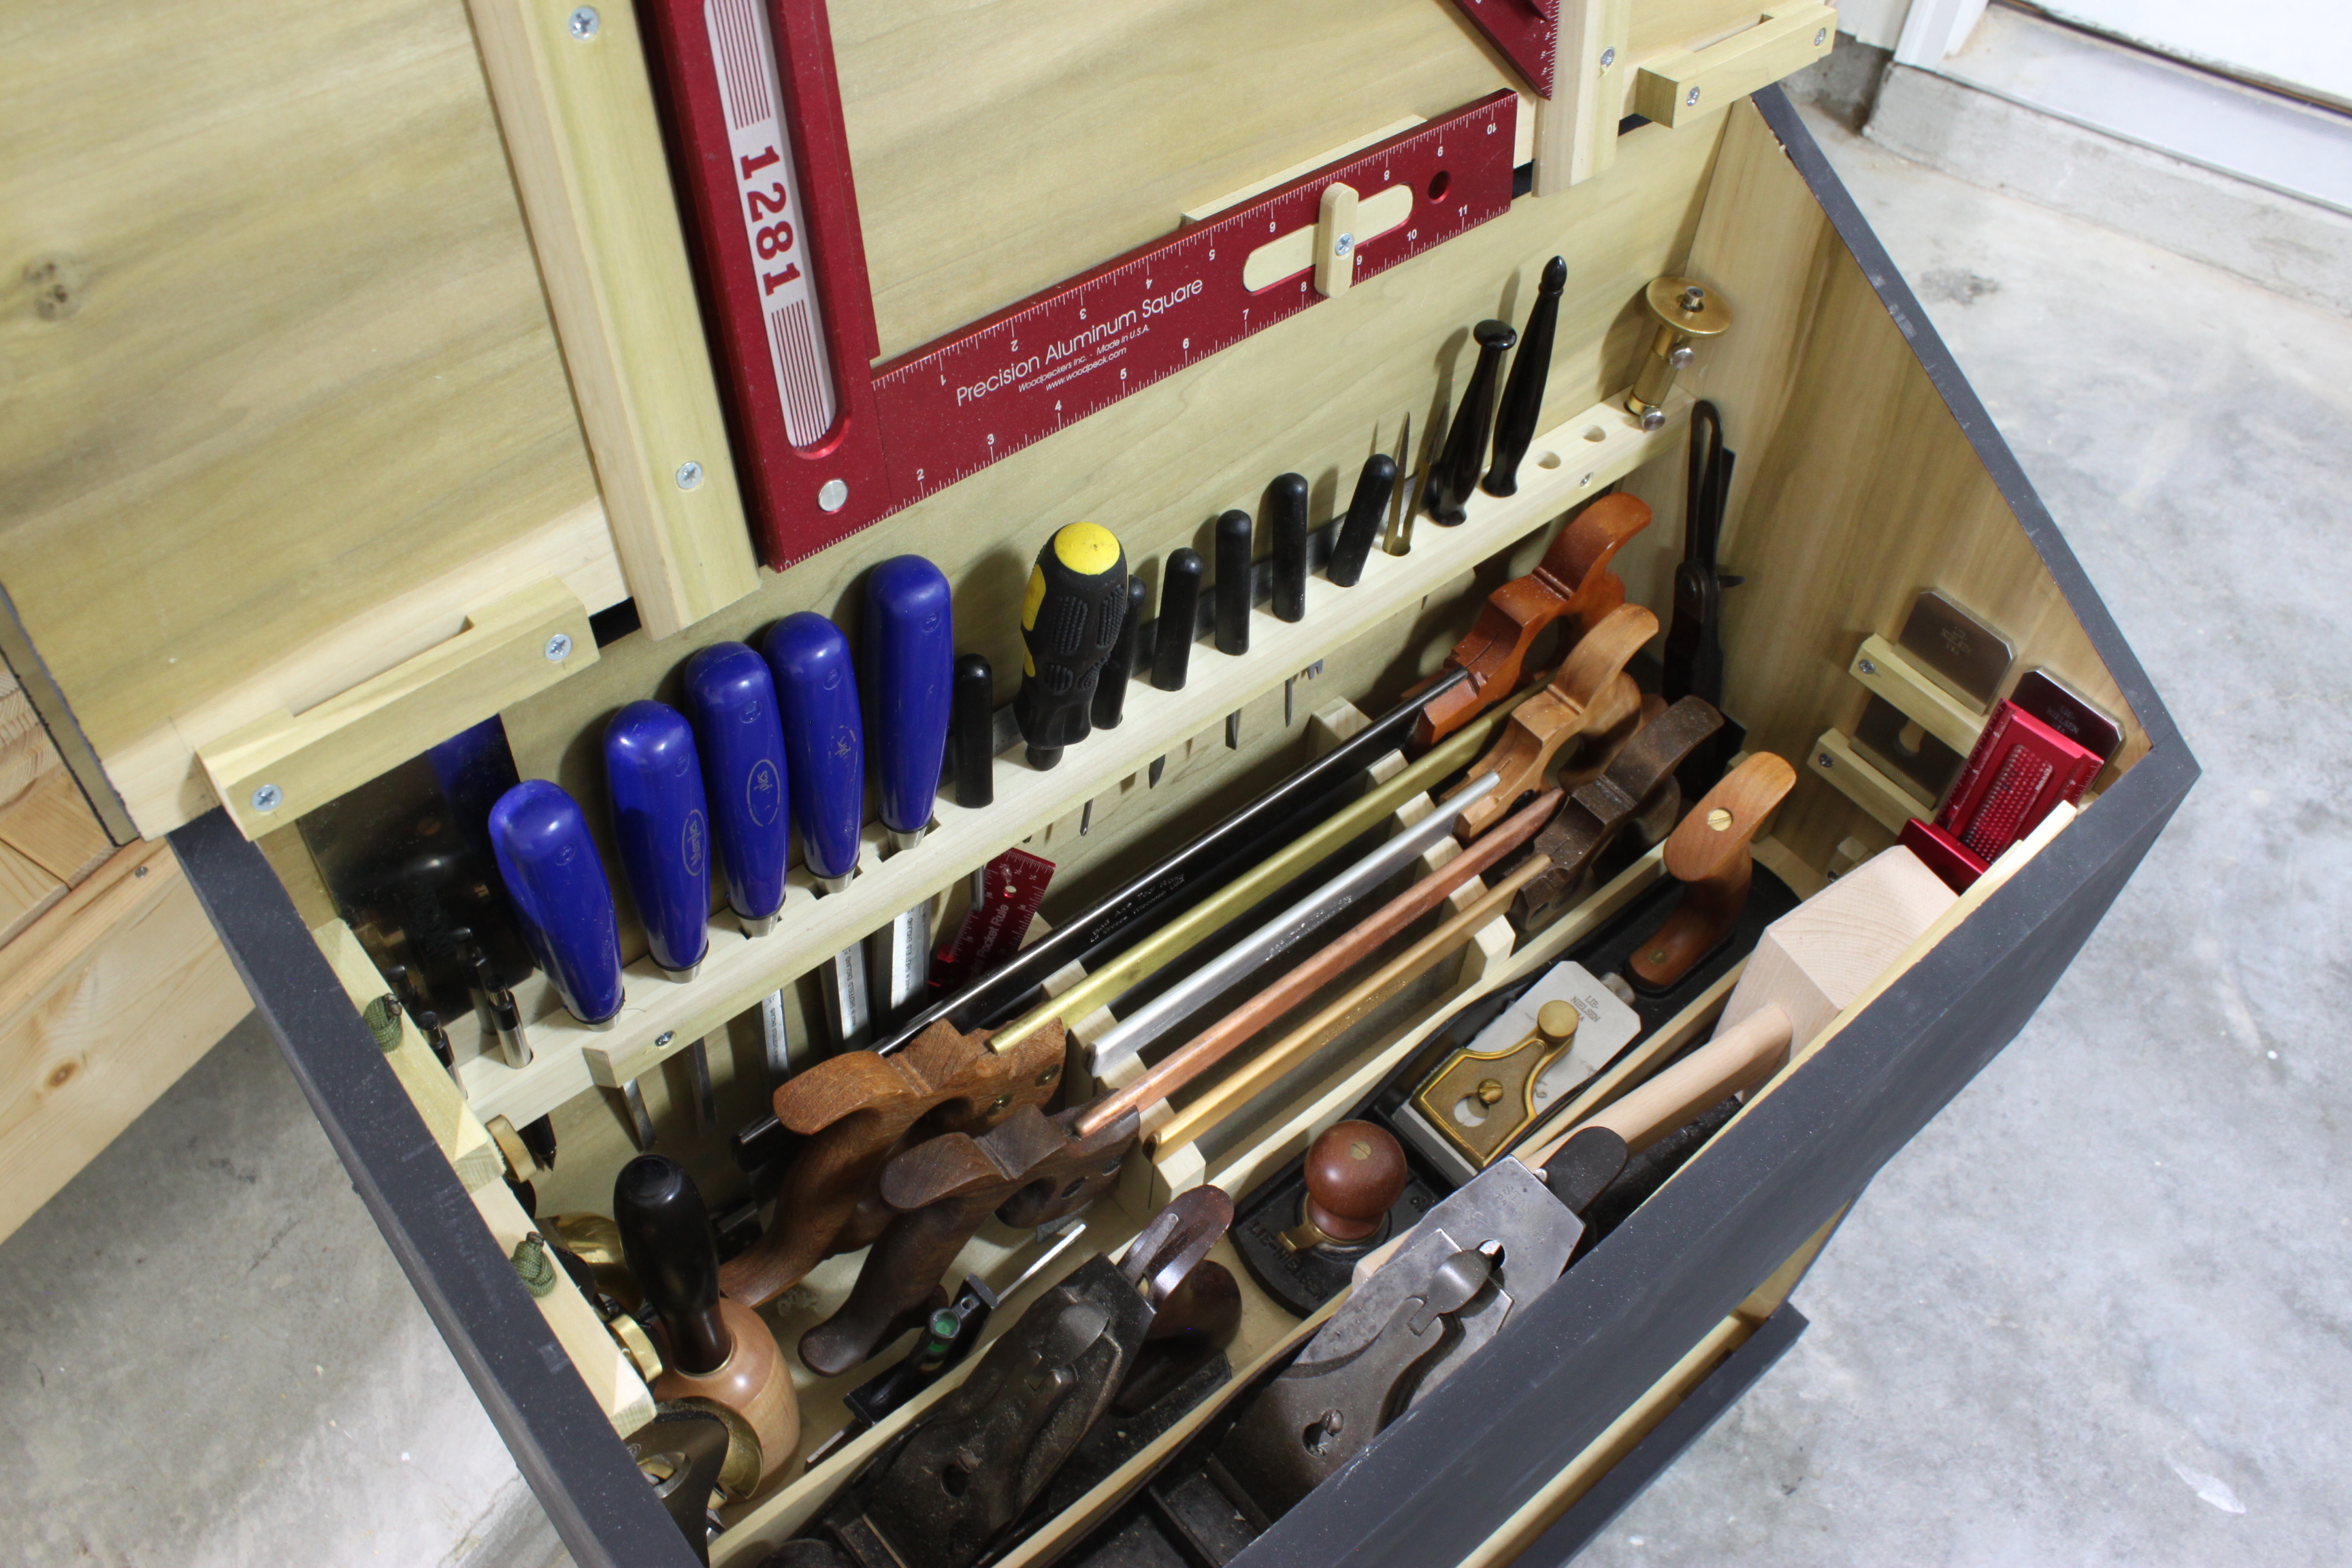
It holds steady but I wouldn’t move the chest without taking it off or at least holding it during the move. Now for the best part; the interior.

dutch chest interior 1

And from the other side…

dutch chest interior 2Before you mention it, yes I know I have a saw problem. I blame Mark Harrell.

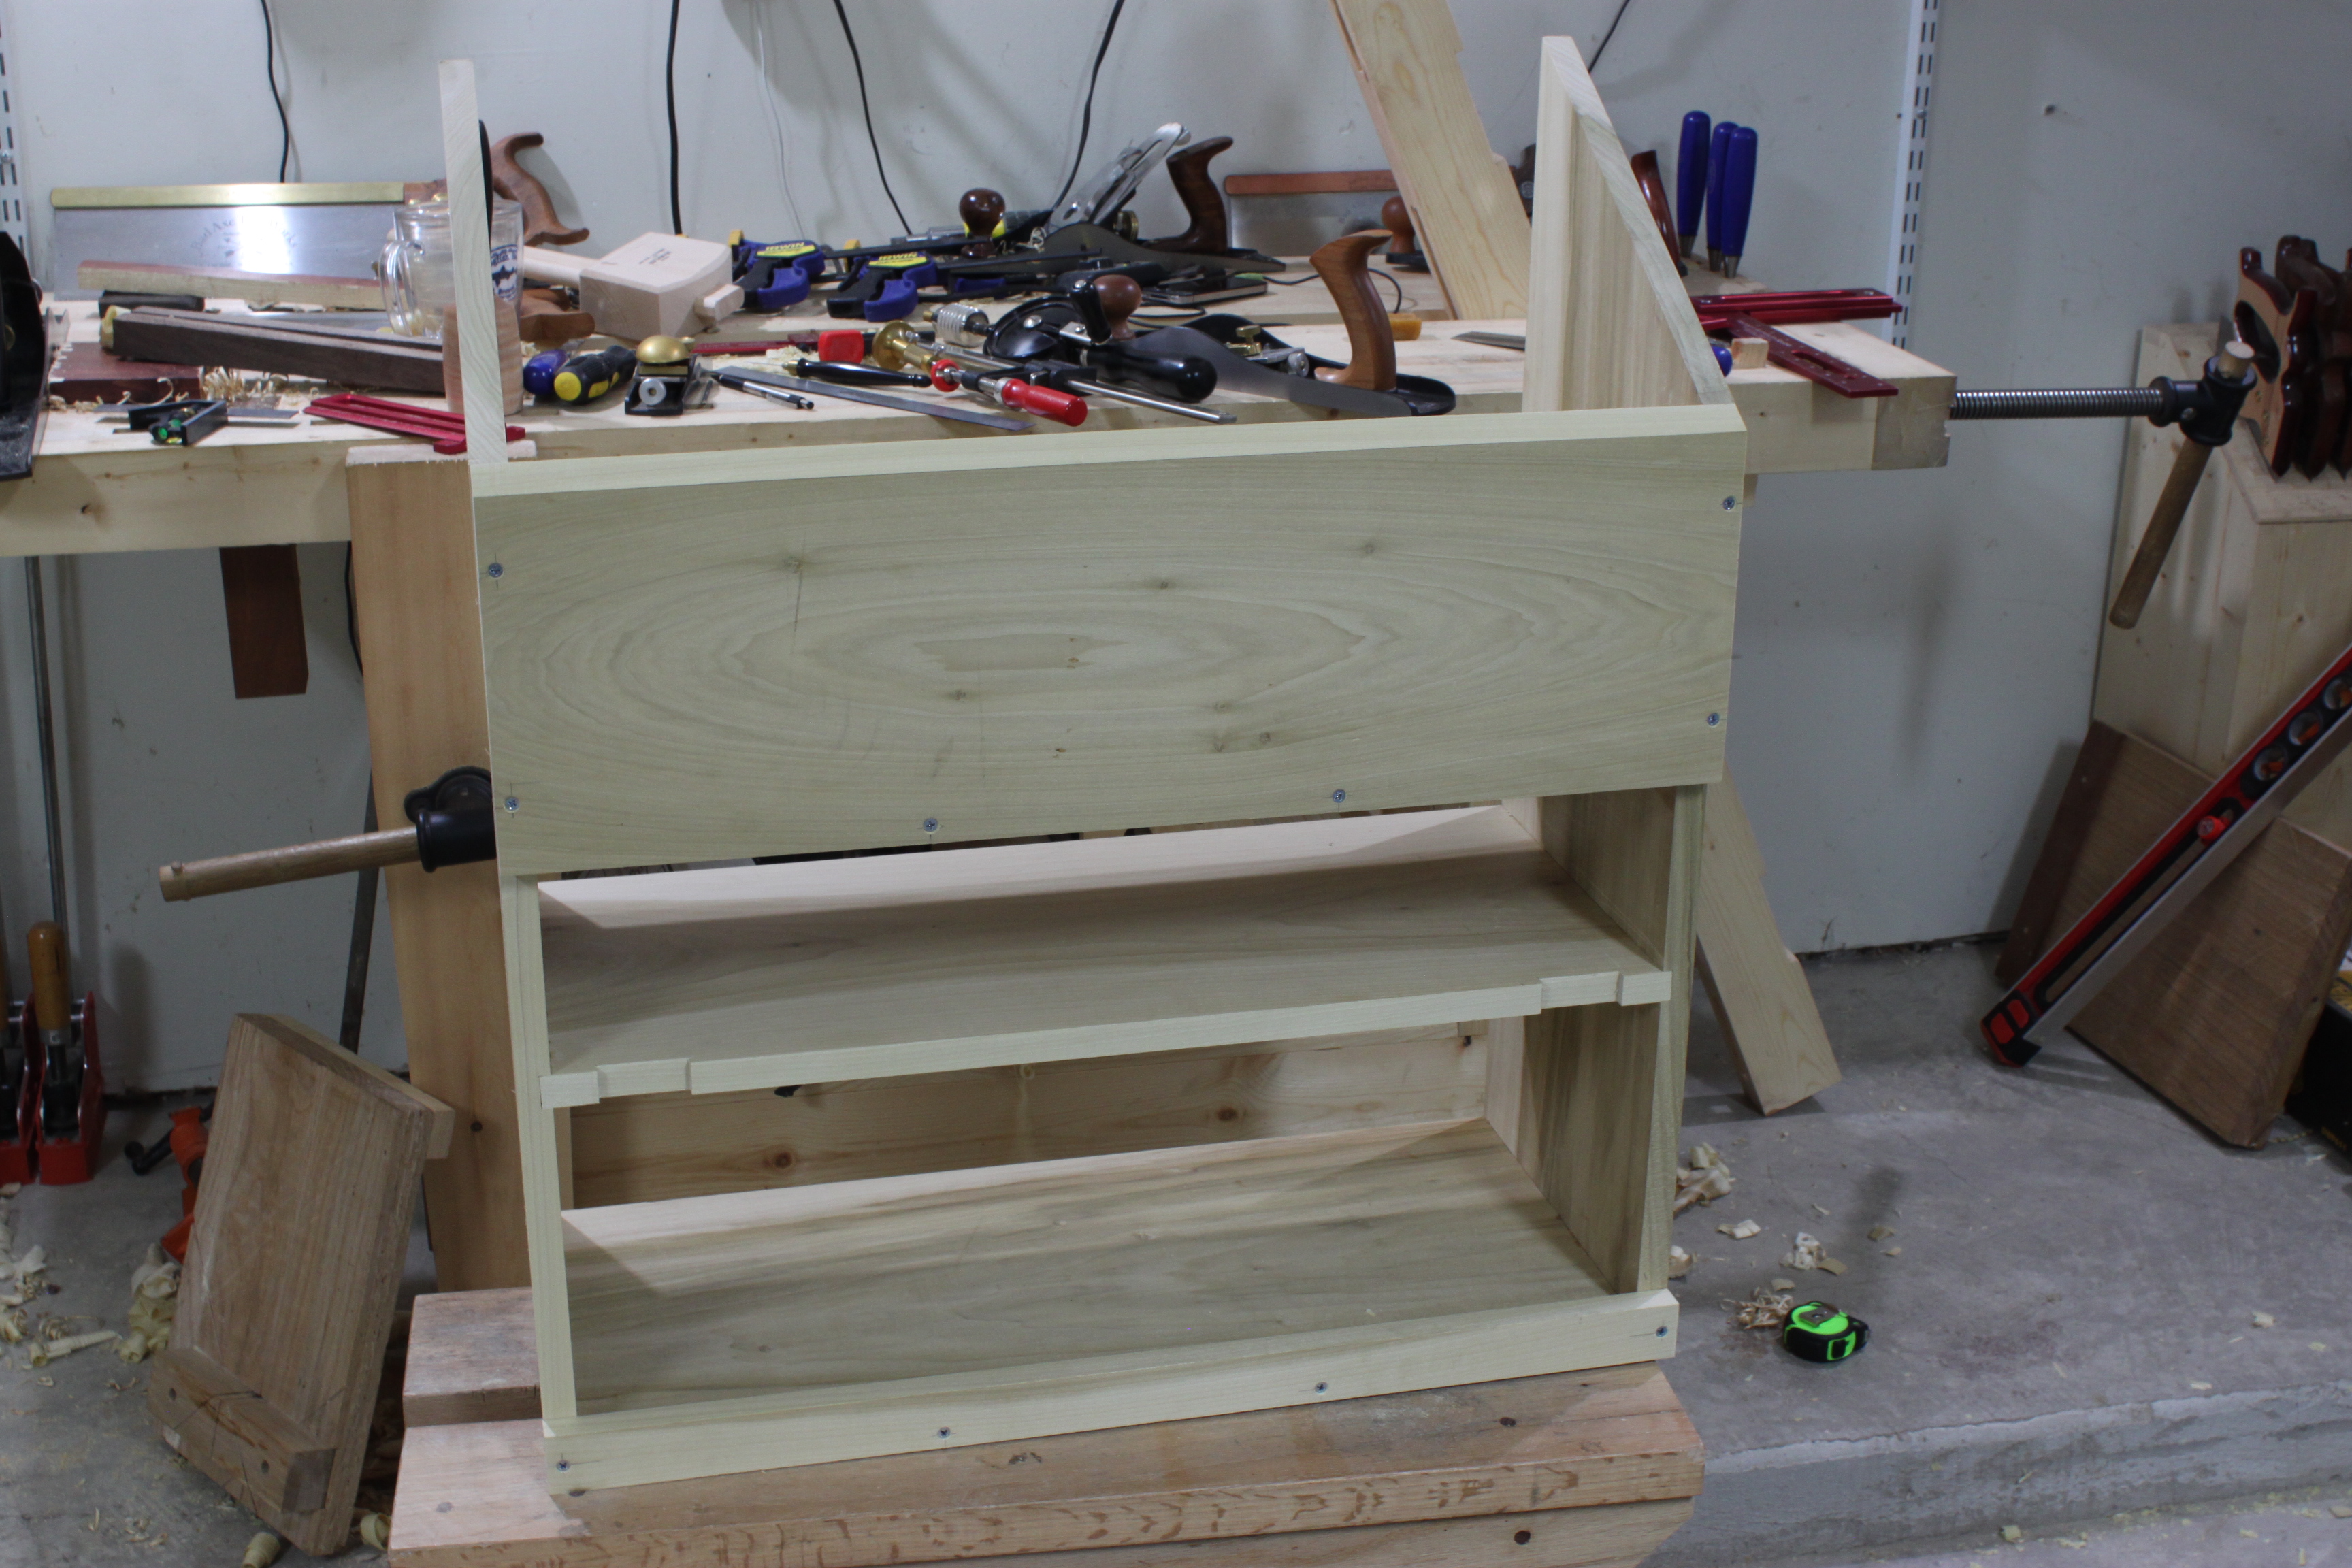
The mistake that I made in making the top compartment deeper by making the upper shelf shorter worked out perfect for me. I really used that extra 1-1/2″ in the top area to maximize storage.

Last but not least the bottom.

dutch chest bottom
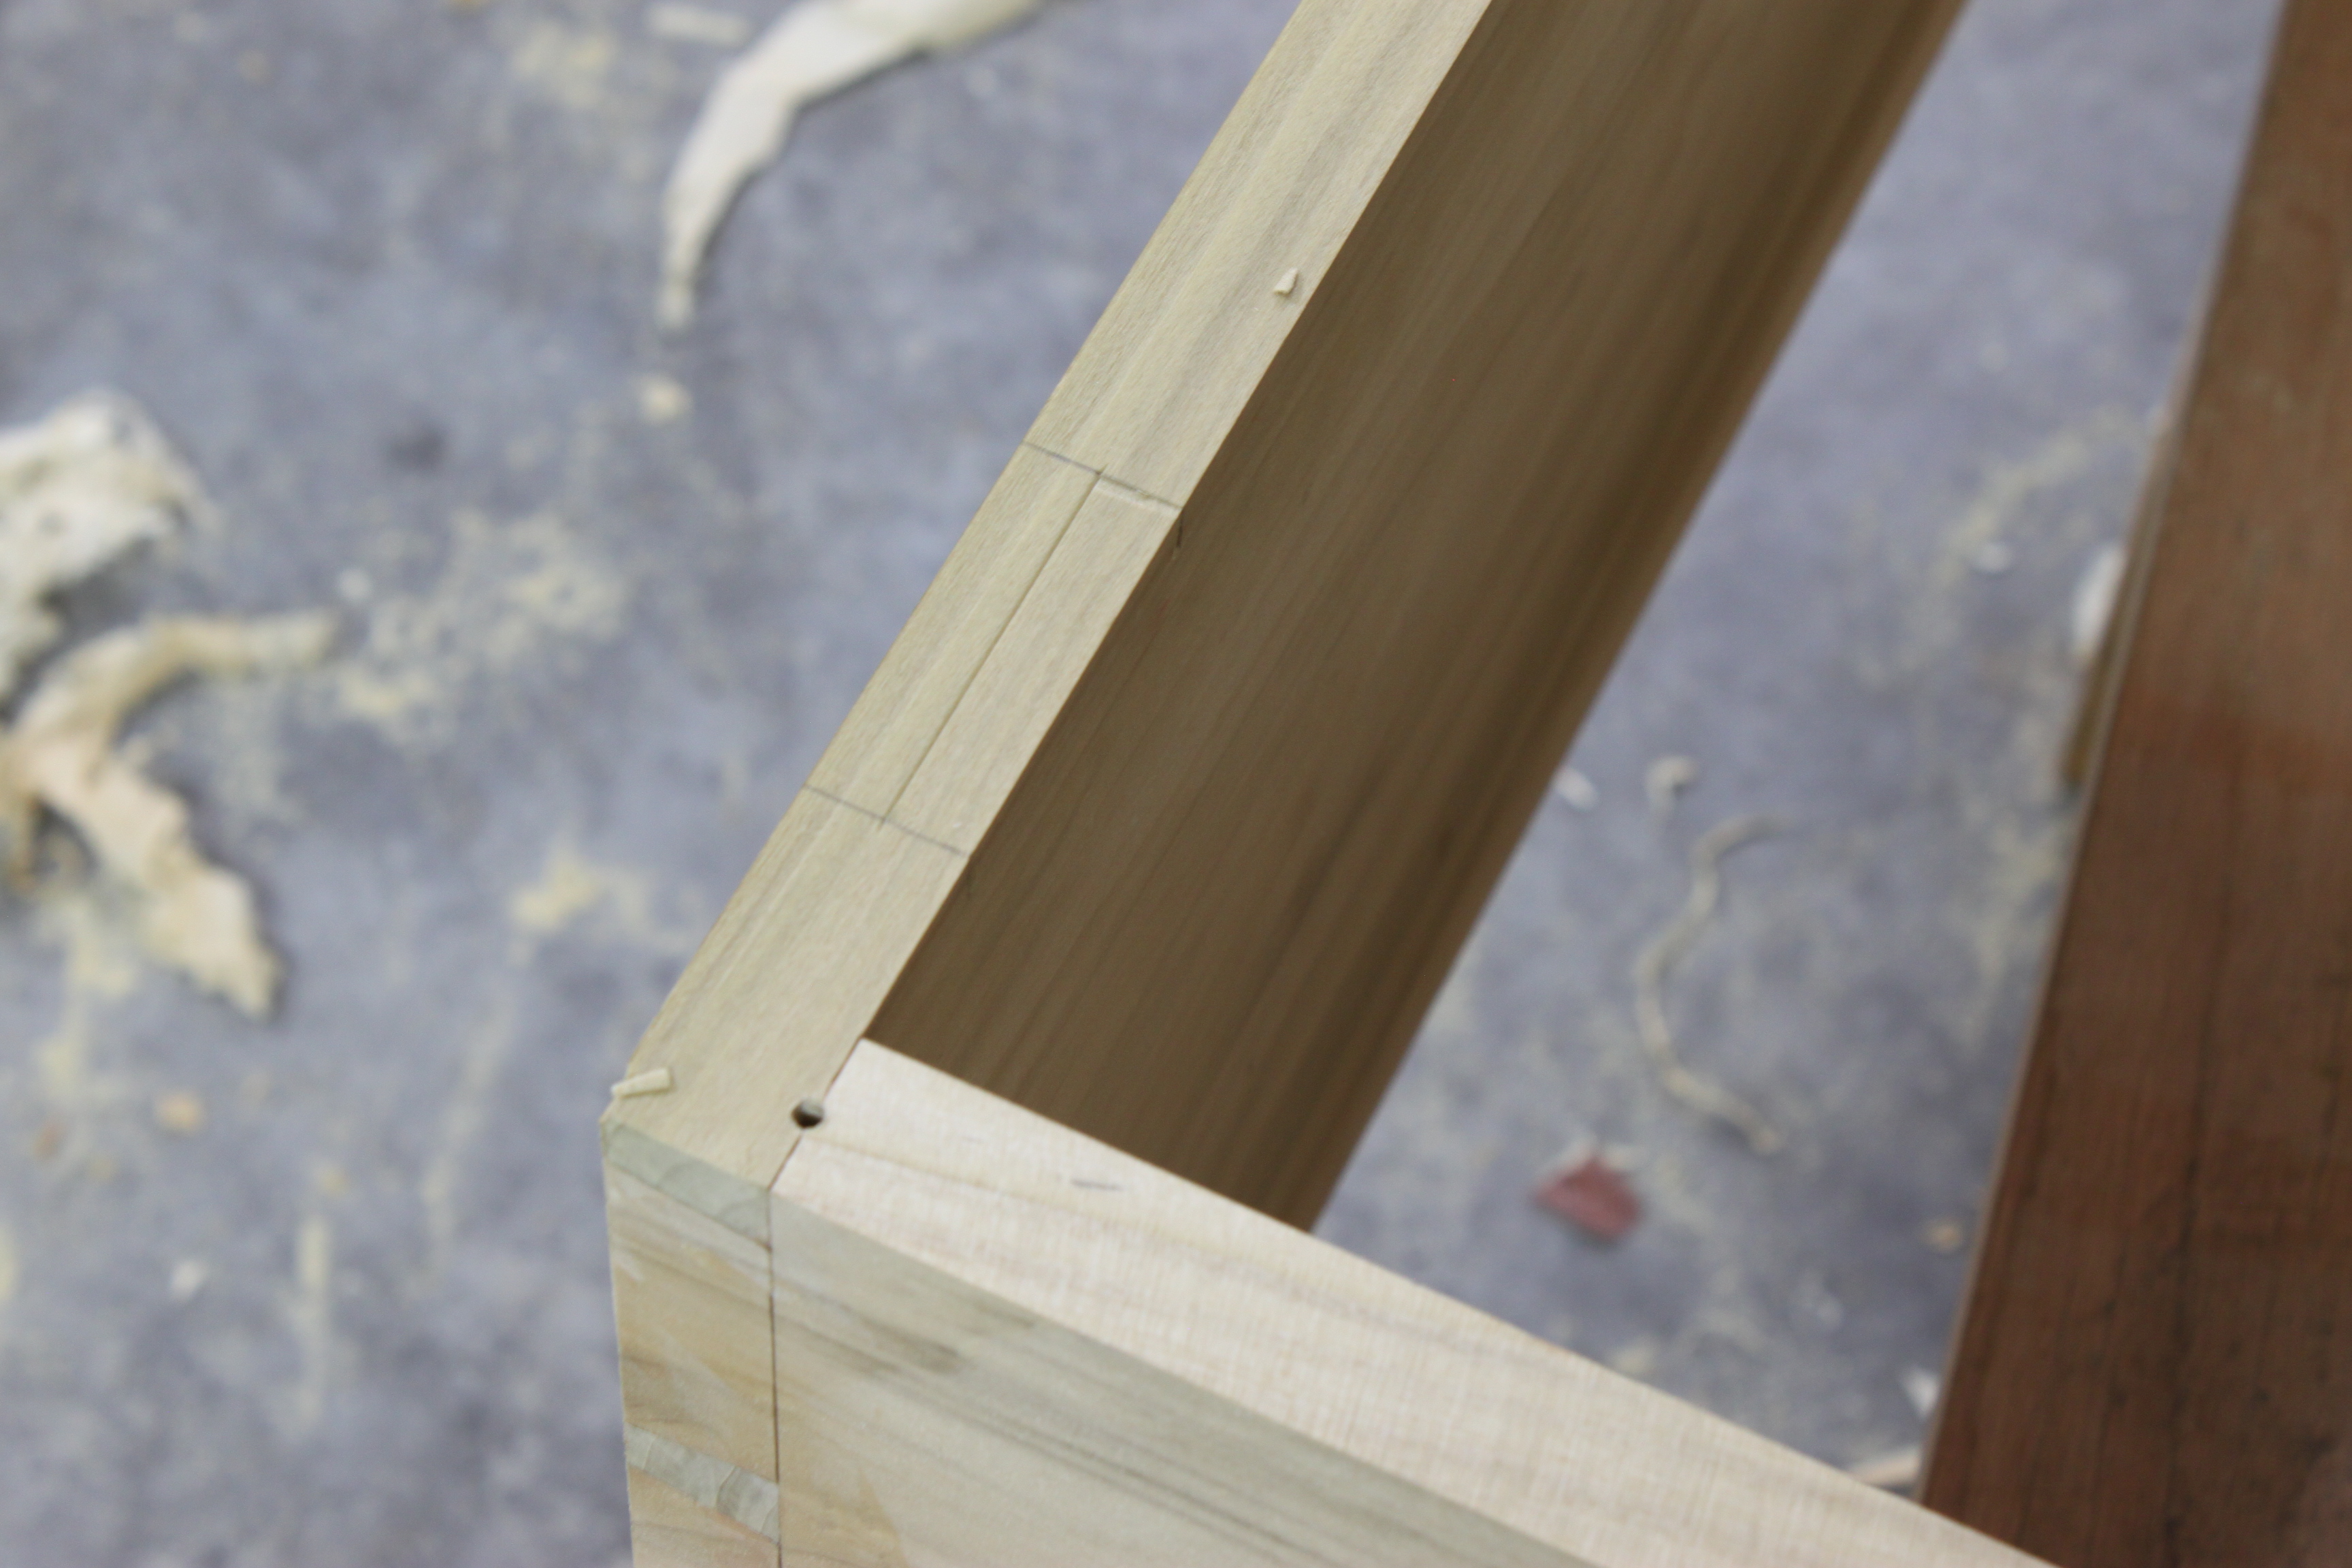
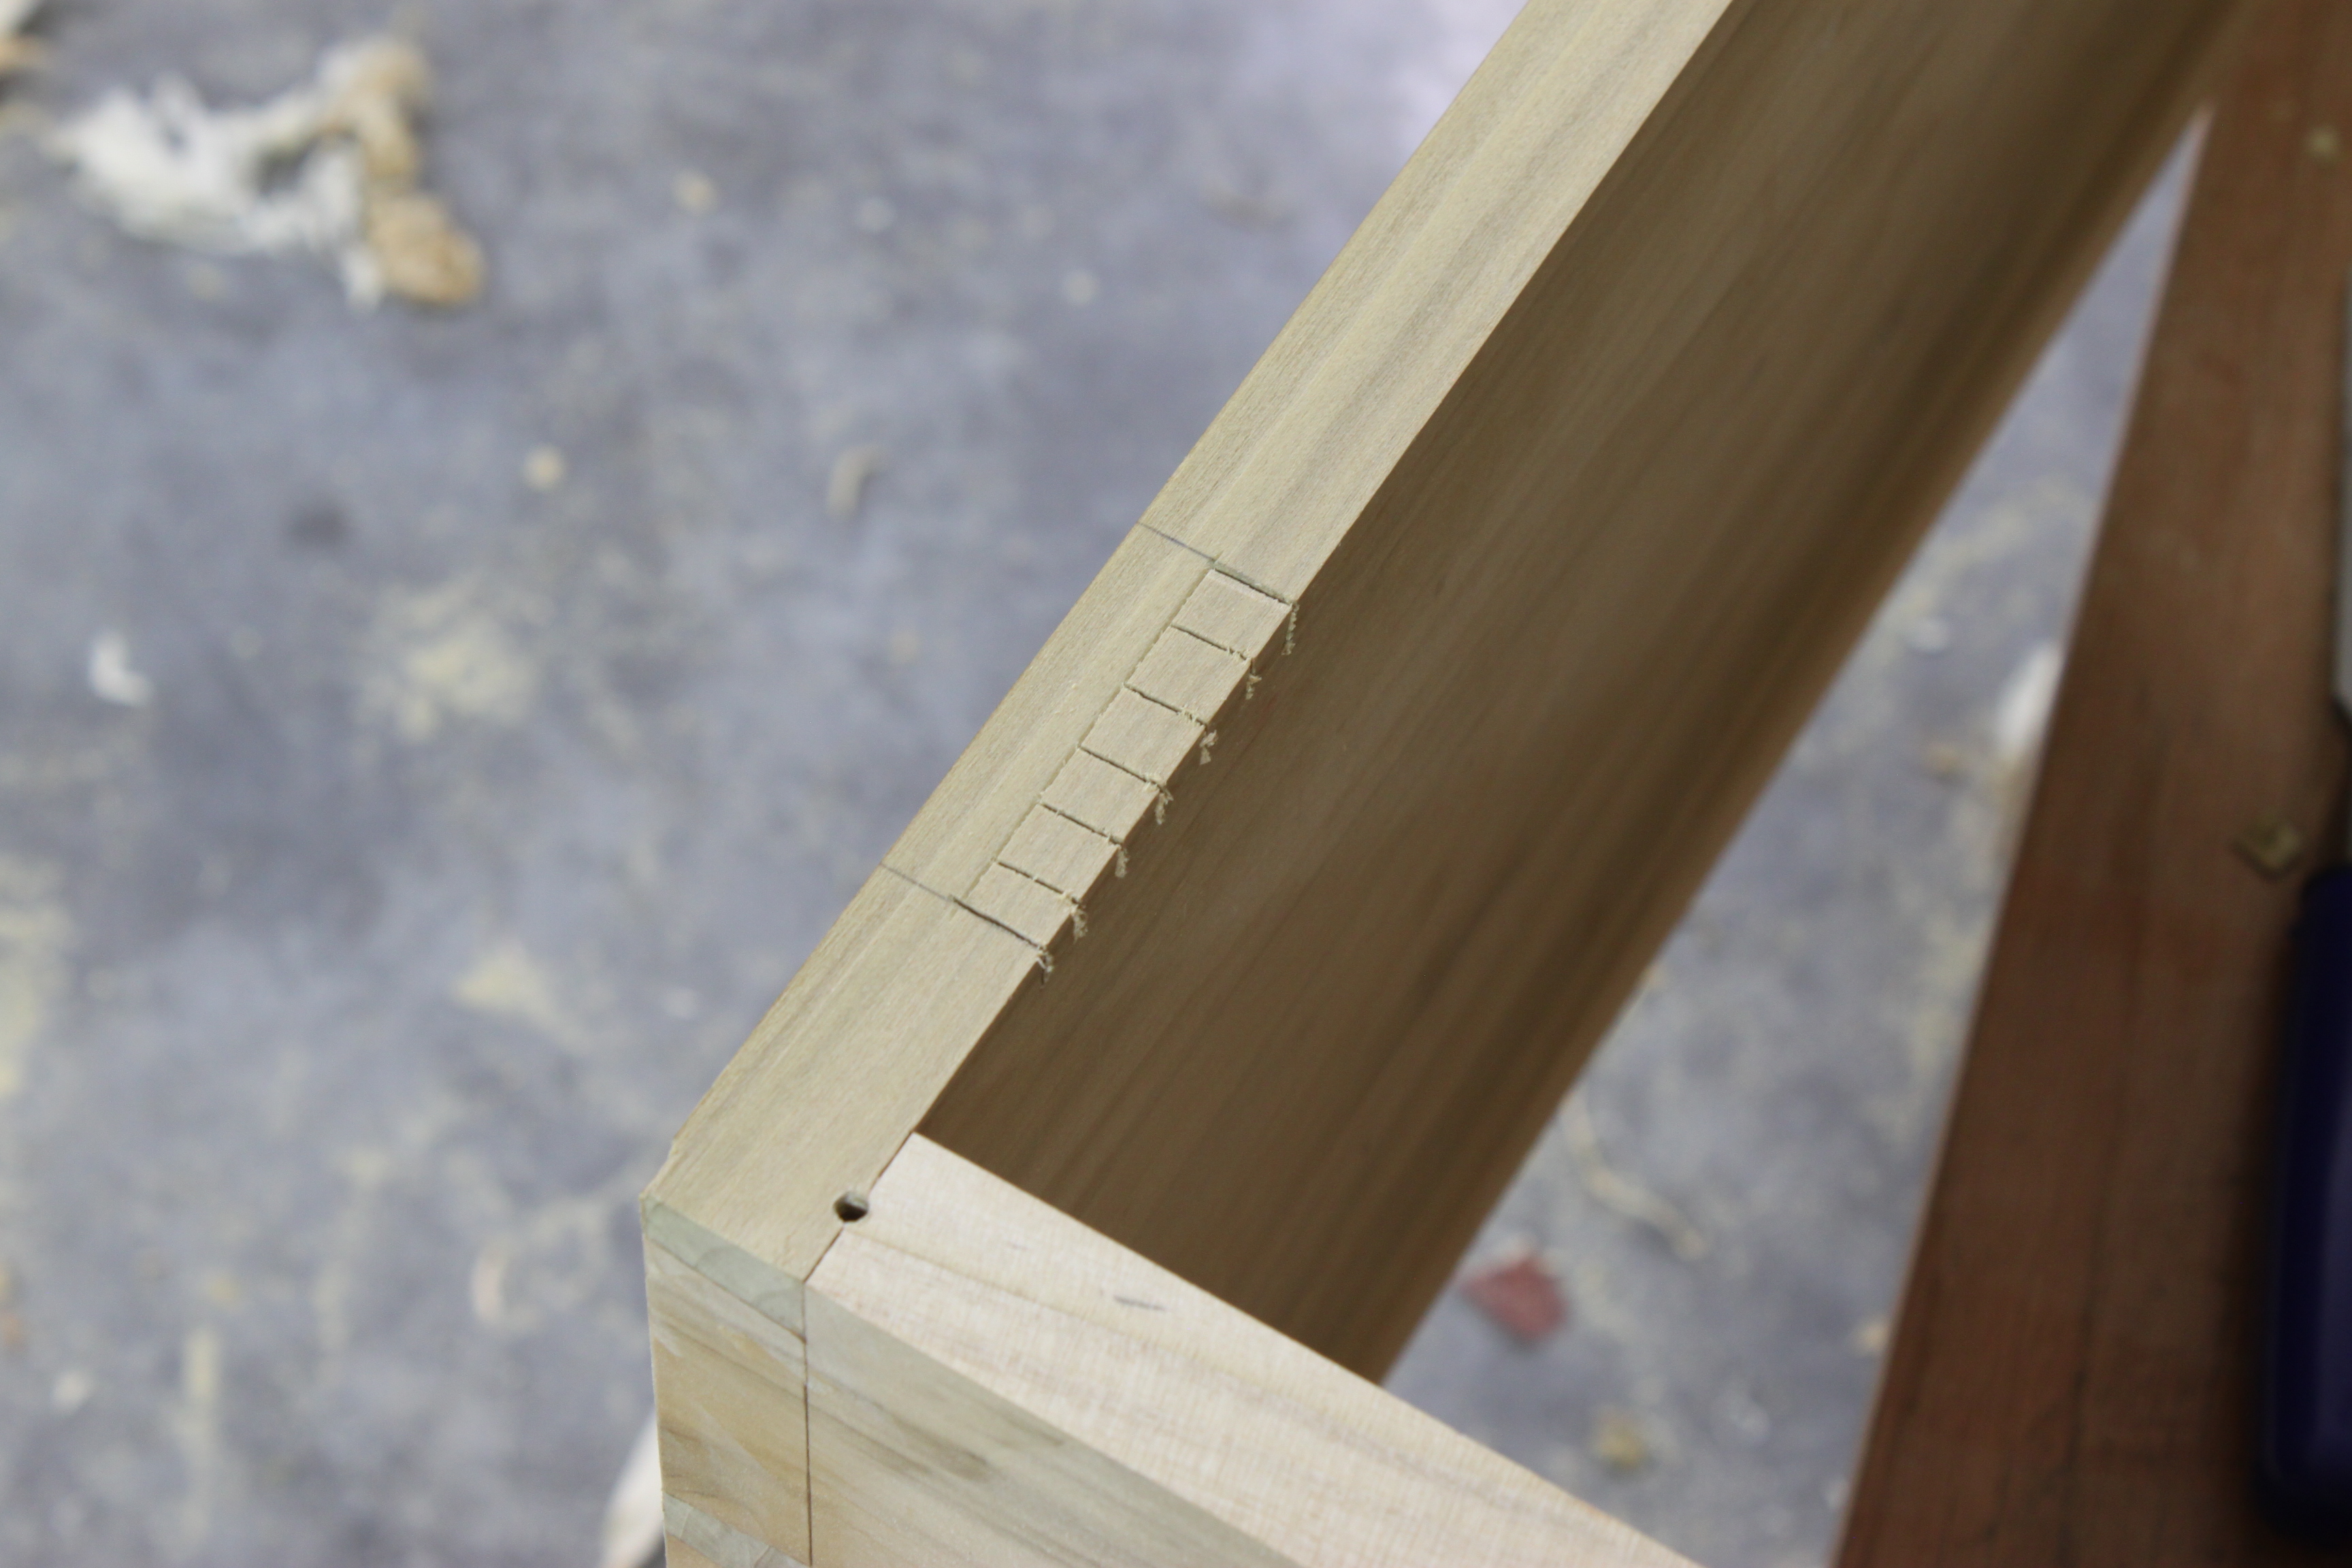
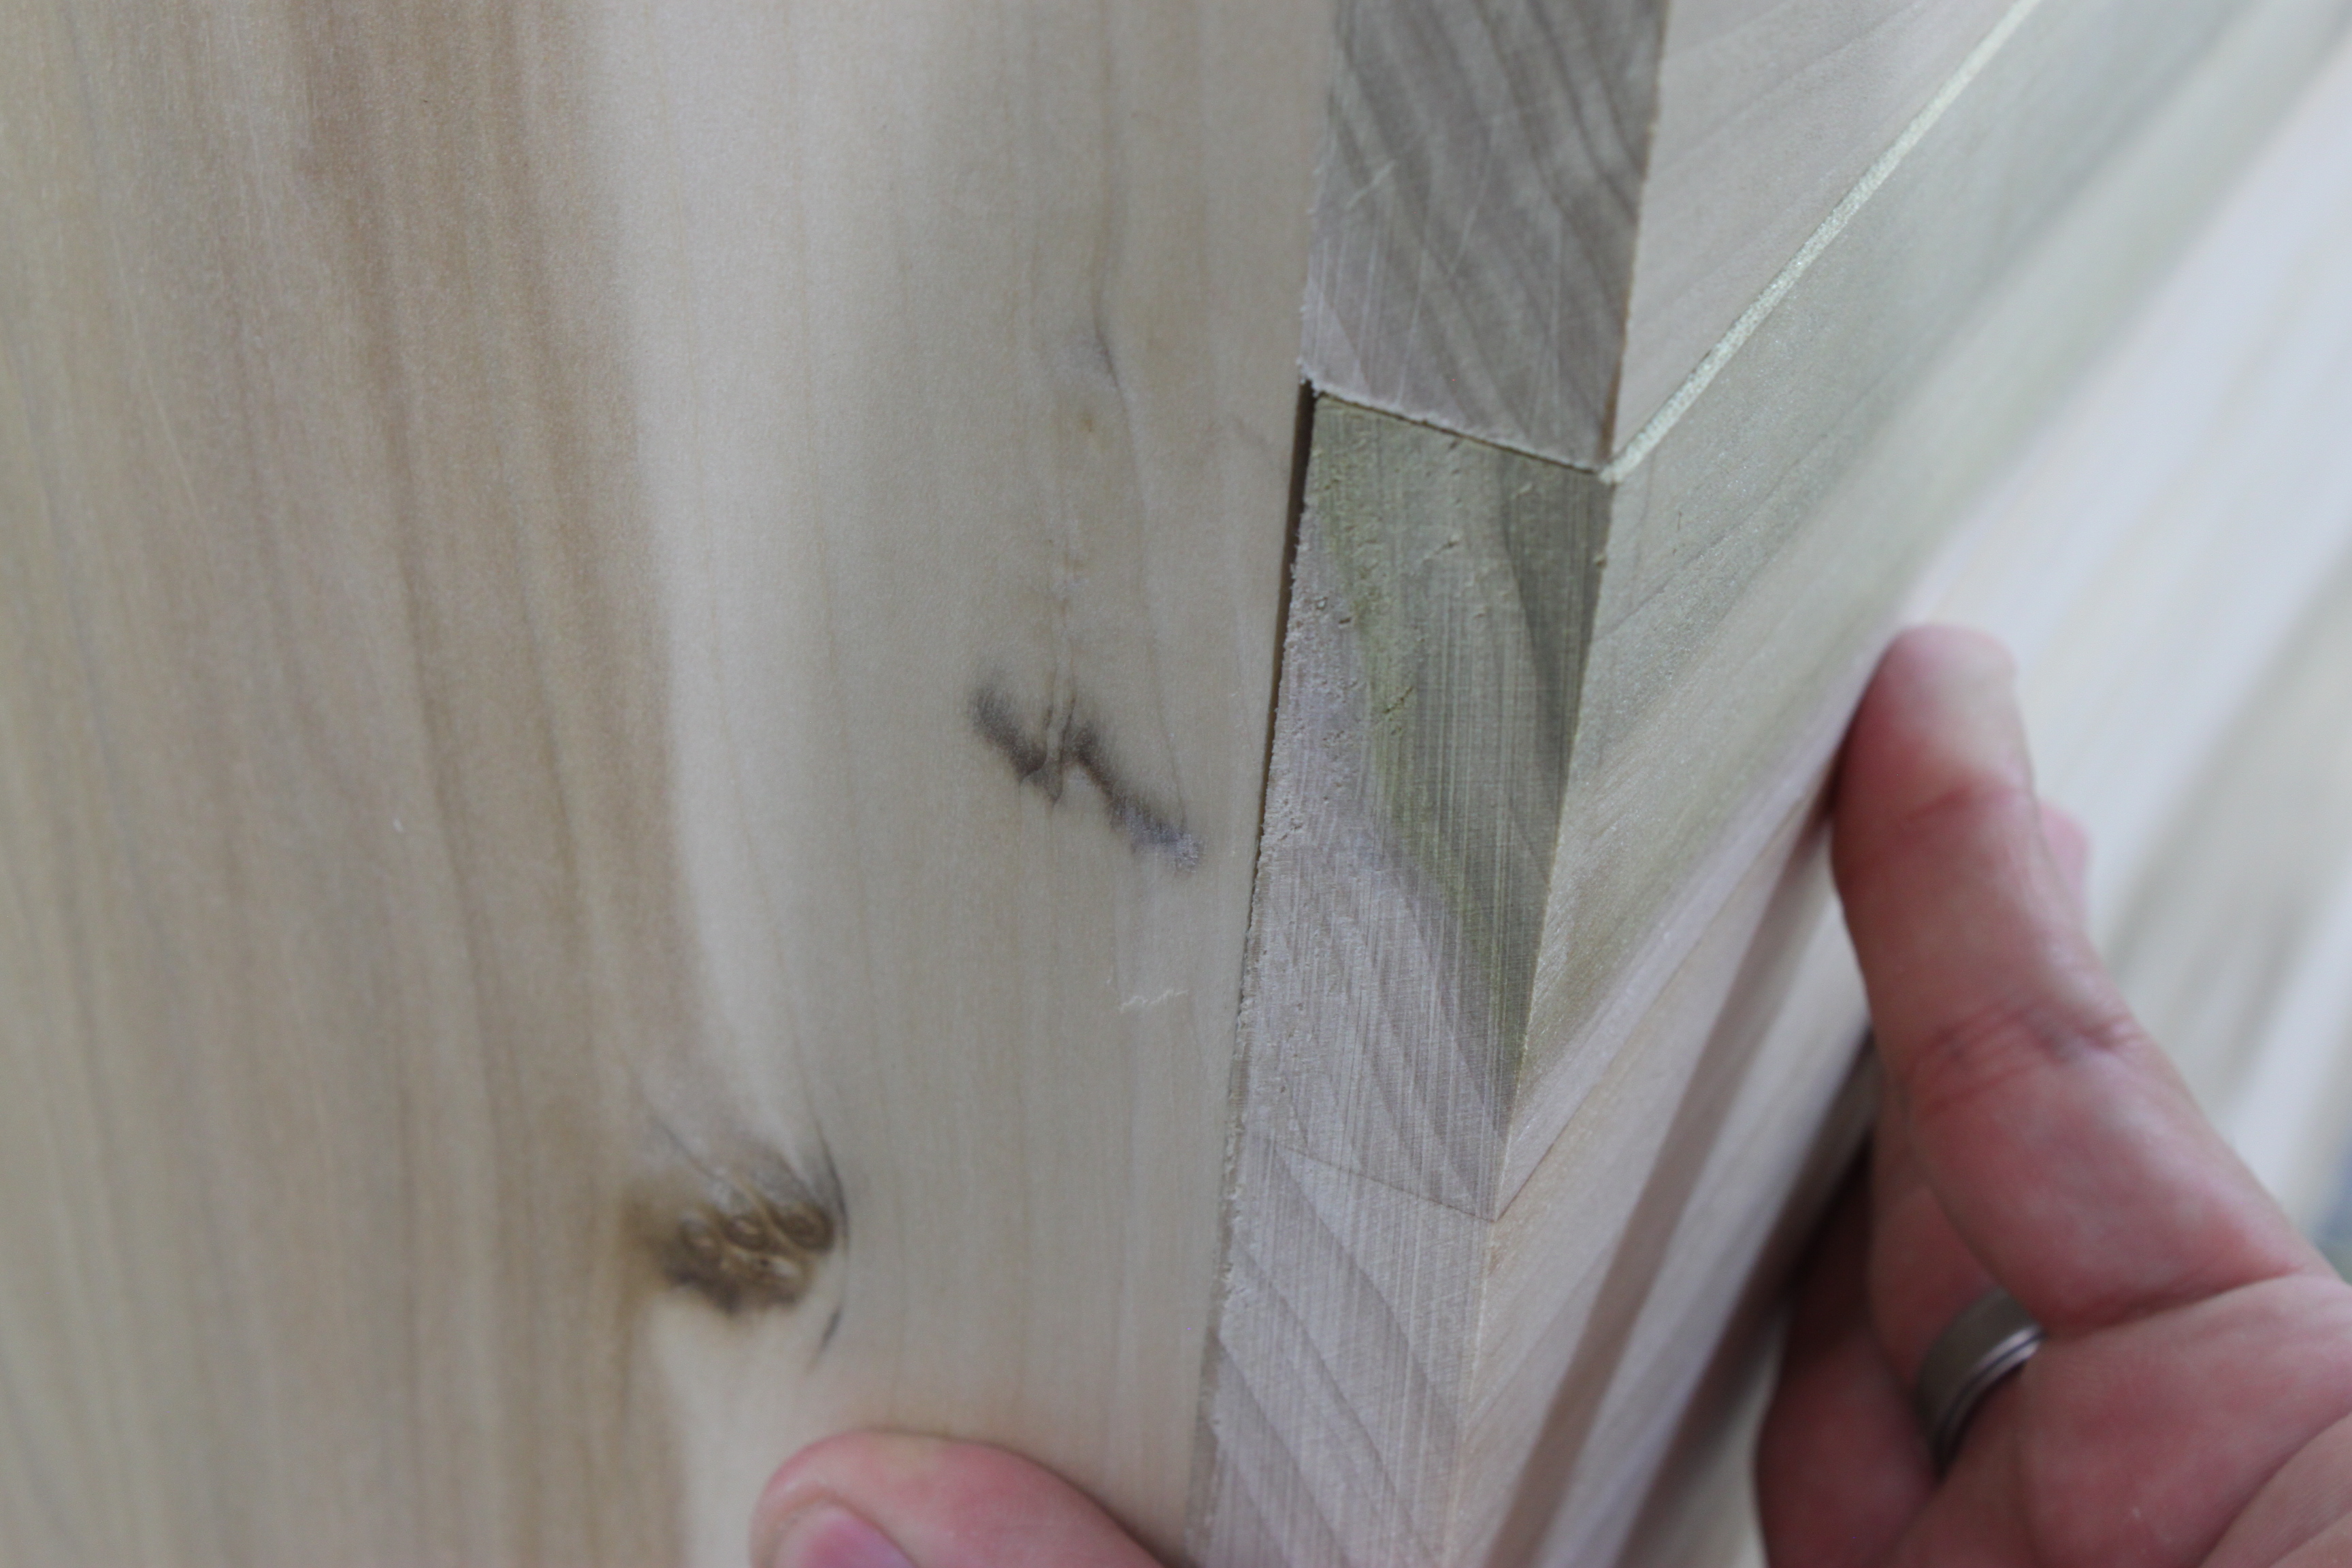
Notice I had to extend the notch next to where the right batten rests. This was to make room for the square. There wasn’t enough vertical clearance even after I dropped the square below the bottom of the front-fall.

I’d have to say that this project was more rewarding to finish than my bench. All my tools now have a home and are protected. Total time was about two weeks of nights and Sunday’s and cost was in the ballpark of $200 all from Home Depot.

Most surprising is how much it holds. Here’s s a rundown:

FRONT FALL

  • router plane adapter
  • 3 small router plane blades
  • router plane fence
  • 4 drill bits
  • 2 counter sinks
  • 12″ square
  • triangle set

TOOL RACK

  • 2 mechanical pencils
  • card scraper (behind pencils)
  • 5 bench chisels
  • 3 phillips screw drivers
  • 3 slotted screw drivers
  • 12″ ruler (behind screw drivers)
  • dividers
  • awl
  • making knife
  • marking gauge

TOP COMPARTMENT

  • low angle block plane
  • rabbet block plane
  • mallet
  • leatherman knife
  • 12″ measuring tape
  • pocket rule
  • mallet
  • 6″ combo square
  • 16″ tenon saw
  • 14″ sash saw
  • 10″ carcase saw
  • 12″ hybrid dovetail saw
  • 10″ dovetail saw
  • #4 plane
  • low angle jack plane
  • #7 plane
  • another mallet
  • bevel gauge
  • protractor
  • low angle toothed blade
  • low angle blade (higher angle)
  • 3″ t square
  • 6″ t square

BOTTOM COMPARTMENT

  • auger bit set
  • brace
  • coping saw
  • hand drill
  • router plane
  • skewed rabbet plance
  • half set even hollows and rounds

I think that about covers it. Thanks for following along.

(edit) As requested, here is a picture of the rear of the chest.

dutch tool chest rear

Everything but the Lid

In the past couple of days I’ve been able to make some real progress on the tool chest. Let’s start from where I left off.

After I took the carcase out of the clamps I jumped a little ahead of myself and attached the lower lip.

lower lipWhen I finished I realized I forgot to cut out the notch where the fall-front locks fall. So I unscrewed the lip and marked my areas.

lower baten catch outlineA little sawing…

IMG_6554chopping…

IMG_6555waste clearing…

IMG_6556and I was on my way to a decent looking stopped rabbet.

IMG_6559It’s hidden under the lip so ugliness doesn’t matter. I also cut out the rest of the notches for the fall-front locks while I was at it.

IMG_6561It probably would have been easier to do the notches for the panel battens at this point as well but I did it once they were already installed on the fall-front.

I added the front to the carcase and took a step back to admire my work from the front

IMG_6564and the rear.

IMG_6565Next was getting the back attached. I used my skewed rabbet plane to cut a rabbet a little more than 3/8 deep across a 5′ board.

IMG_6568

I clamped it to the back of the chest and screwed everything in place using the whole board.

IMG_6570Then I used a flush-cut pull saw to get the right fit rather than measuring.

IMG_6571I added the opposing groove for the shiplap and finished up the back. At this point I was dying to see what it would look like with tools to I did some glamor shots.

IMG_6577IMG_6578This got me excited for the home stretch. After I fit the fall-front to fit vertically I clamped it and marked it out the same way I did the back panels.

IMG_6580I made the four lock catches out of one piece of wood that I cut the 2″ wide dado in…

IMG_6587before cutting them into individual pieces.

IMG_6589Like I had mentioned in the beginning, I used all dimensioned lumber from Home Depot and did basically no milling to any boards just so I could speed up this building process. I finally ran into my first snafu.

IMG_6590The board I used to get my full width for the front-fall had a little twist so I hit the catches when I tried to insert the locks. Speaking of which, up until today I’ve used pretty much every scrap and have not purchased any additional poplar. This left me short of wood for the lid, locks, and battens. Today I made another trip to Home Depot to get the remaining wood and decided to cheat in the thinner stock pieces and bought some already 1/4″ and 1/2″  pieces for the locks and battens. Anyhow, I took off the one catch and took off about 1/16″

IMG_6592I put it back on and everything fit nice!

IMG_6594One of the last things I did today was to install the strap hinges to the case itself. I measured the height at 9/16″ and marked my case to cut out the notches but when I fit them they were still too high.

IMG_6595I took off an additional 1/8″ and that made things fit just right.

IMG_6596Now all I need is the lid which is currently clamped and waiting. As much as I want to finish things up tonight I don’t think I’ll be able to. My loving wife has been patiently waiting for me to finish this chest so we can catch up on Breaking Bad and I think I owe her an episode or two tonight.

Sorry this post was so long but as this is really the accumulation of about 3 or 4 nights worth. If you made it this far, thanks for sticking with it to the end. Once the lid is installed all I have left is to paint. I am using milk paint and I can’t decided between slate or pitch black. Anyone have any suggestions?

Carcase Complete

A couple nights ago I wasn’t entirely productive but I did manage to knock out the remaining dados for the shelves.

finished dados

However, yesterday was a different story. After I finished up the dados I did a quick dry fit to make sure everything was good. Only one of the three dados fit good right from the first fit. The rest I needed to take a little off the shelves to get a snug fit.

fitting shelves

Another dry fit proved that things were coming along.

dry fit

I took everything apart and clamped the sides together so I could cut the 30° angle.

top angle

This was one of those times when I proved how much I need a tool chest. Somehow I managed to lose my protractor and spent about 30 minutes looking all over for it. I had just used it the previous day but somehow managed to completely lose it because I still haven’t found it. Either way I just used the measurements from the plan and connected the dots and cleaned up it all up.angle clean up

Once I was happy with everything I did another dry fit and prepped for glue up. glued up

At this point I happened to notice that I made a little error in measuring. It wasn’t a matter of measure twice, cut once but rather the location of the top shelf. In the plans its shows the location for the bottom shelf on one side of the chest and the top shelf on the other. I didn’t notice that the top shelf measurement was taken from above the 1-1/2″ lower skid so I made my mark from the bottom of the chest. Now instead of having 6-1/2″ of clearance on the second shelf, I only have 5″. Not a horrible mistake but one none the less. At this pace there is a good chance I will be done by this weekend.

It Begins at the Big Box Store

Today I finally got moving on starting the Dutch Tool Chest. My day started at Home Depot where I got all my materials and hardware. Why Home Depot? That’s simple; my purchase was mostly free all thanks to my Amex. Due to the fact that I use it for about 98% of every purchase I make I easily rack up enough points for a $100 gift card about every 3 months. Lately we’ve been using them elsewhere so this time I felt like getting some financial assistance for my chest.

I honestly don’t like buying wood from any home improvement store (mainly due to price) but when it’s free, why not. I bought 24 linear (or board) feet of 1×12 poplar. There where two 7′ pieces that were straight enough for me to take and then I had a 10′ piece cut in half. Add some casters, screws, a set of strap hinges, and a couple of handles (which I will most likely take back) and I was pushing close to $200. Throw in my military discount and $100 gift card and I walked out of there spending about $80. Even though the poplar was $5.32 a foot, I still look at it as a win. Since it’s S4S I don’t have to worry about the labor of milling and it’s straight enough where everything will end up (mostly) square.

poplar boardsThe seven foot pieces were perfect to give me the two sides, bottom, two shelves, the front, and lower skid with some material left over. After everything was cut to size I noticed that the boards were a little tapered in width. They were just over 11-1/4″ wide so I milled the boards to get them where I needed them to be so I could start the dovetails.

I clamped the two side pieces together and marked out the tails.

IMG_6524After I made all my cuts I kept everything together and cut the shoulder off the end tailsIMG_6526before I separated them to chop out the remaining waste.

IMG_6529I do wish I would have gone with a steeper angle for the dovetails but oh well. For marking the pins I had to pull my bench away from the wall in order to accommodate the length of the bottom of the chest.

IMG_6530When everything was all said and done and I attempted a dry fit. It was a little snug on the left side but a quick cleaning of the pins and another try and things were fitting well!

IMG_6534Next and last for the day was starting on the dados for the shelves. I currently have all four marked and ready to go and even got one started before I had to call it quits for the day. IMG_6537I’m real happy with the progress made today and can’t wait to get some more done tomorrow.

A Home For Tools – Why the Dutch?

Dutch Tool Chest PWWWhen it comes to woodworking design, I have none. Most of what I build (probably along with most hobbiest woodworkers) is modification/redesign of something seen somewhere else. I do have a couple of “original” pieces but I consider them frankeinsteins of many different elements seen elsewhere. Sometimes it’s just easier to follow someone else’s plan.

Since I’ve taken up the hobby of woodworking I’ve managed to start a decent collection of hand tools. The problem is that I have no where to store or protect these tools. My most used ones are kept on a shelf below the bench; during projects they are basically stored on any flat surface that isn’t at the time occupied. It seems I spend more time making room and looking for tools then I do using them.

Once we had settled in our house here in NC last year I began thinking about how I wanted to store them. Initially I thought about building the hanging tool cabinet from the video series on Finewoodworking.com. However, there was one issue. Cabinets require organization and layout and as I am still building my tool collection my OCD doesn’t agree with that. If I were to build a cabinet I would need to have a space for all my tools as well as future purchases and since I don’t know when or what I will buy, I just won’t do it.

So my next choice was a tool chest. Of course like many other woodworkers I was drawn to the Anarchrist’s Tool Chest. Great design, solidly built and tons of storage. The estimated completion time is 40-60 hours or so (more like 70-90 for me) and since my woodworking time is about an hour and a half at nights (when I make it out there) and about half a day on Sunday’s, that’s a couple of months of shop time. That’s more effort than I want to dedicate right now. Then Chris Schwarz came out with the two day chest. This really intrigued me for time constraint reasons however as I don’t own any power tools I would need to go to the wood hobby shop on base. Definitley fesible but I really enjoy working at home much more so I was just waiting on my last option.

For anyone that follows the Lost Art Press blog (along with many other blogs that have built one), the Dutch Tool Chest is where it’s at right now (at least for me). It’s quick to build, requires little material, is straight forward in joinery and has lots a space. The article was to be published in the Oct issue of Popular Woodworking so I’ve just been waiting around. Imaging how happy I was when I checked my email two days ago and my digial issue was waiting for me!

Did I really need the plans to build this chest? No, of course not. It is a straight forward and simple design and I could have come up with my own dimensions based off the numerous articles and blogs as well as to accomodate my own needs. As I mentioned in the beginning, sometimes it’s just easier to follow plans then to come up with my own. I bet you’ll never guess what I’m starting on this weekend.